How to Use Color Correcting Makeup for Beginners: 7 Shades Explained
Color correcting makeup looks intimidating the first time you see a palette of green, peach, and lavender swatches sitting next to your foundation. Most beginners either skip it entirely or apply the wrong shade and end up looking worse, not better.
Here is the honest truth upfront. Color correcting genuinely works when you match the corrector to the actual color theory behind your concern. It does not work as a one-shade-fixes-all approach, and applying it incorrectly can leave visible grey undertones or patchiness under foundation.
This guide breaks down every major color corrector shade, what each one actually fixes, and the exact order to apply them in. Here is everything you need to know.
How Color Correcting Actually Works — The Color Theory
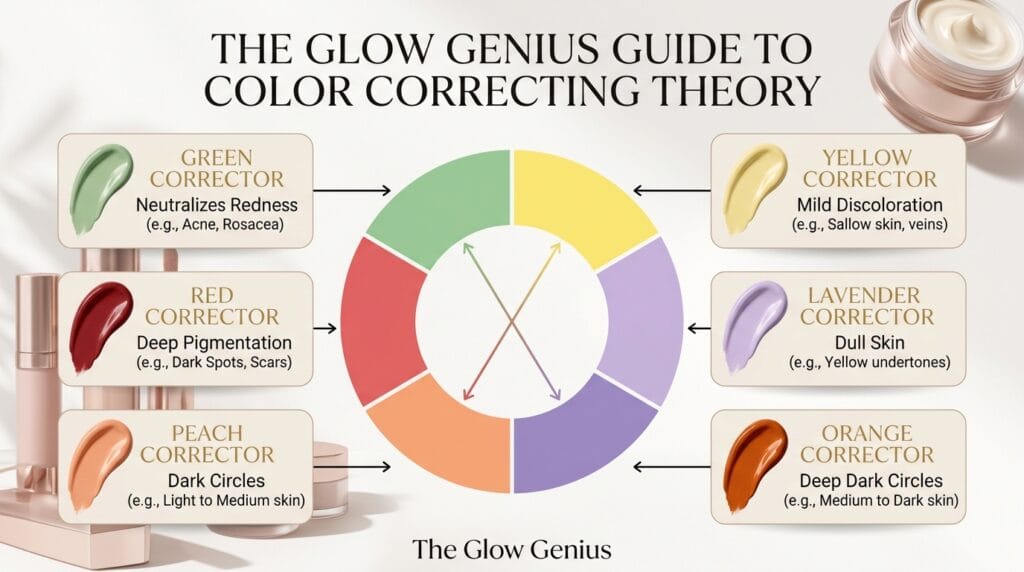
Color correcting makeup relies on basic color theory, specifically the idea that opposite colors on the color wheel cancel each other out visually.
- Green sits opposite red on the color wheel, which is why a green color corrector neutralises redness from acne, rosacea, or irritation. The green pigment visually cancels the red tone before foundation goes on top.
- Peach and orange correctors sit opposite blue and purple tones, which is why they work so well on dark circles and bruising, both of which typically carry blue-purple undertones.
- Yellow correctors neutralise purple and blue-based discoloration as well, but with a lighter touch, making them suitable for milder dark circles or mild dark spots.
- Lavender or purple correctors counteract yellow, dull, or sallow-looking skin, brightening the complexion by cancelling excess yellow tones.
- Understanding this color theory is the entire foundation of using color correcting makeup successfully, since guessing a shade without this logic almost always leads to a mismatch.
3 Things to Know Before You Start
Before you buy or apply any color corrector, keep these three points in mind.
- First, less is more. A thin, targeted layer works far better than a thick application, since color correctors are pigmented and can look obvious or cakey if overapplied.
- Second, color correcting always goes under foundation, applied directly onto concealer or bare skin after skincare, never on top of your base makeup.
- Third, shade intensity should match your skin tone. Deeper skin tones typically need a more saturated, deeper version of a corrector shade, since a pastel version may not fully cancel the underlying discoloration.
Always blend the edges thoroughly with a damp sponge or brush, since a harsh line between corrector and skin is one of the most common beginner mistakes.

7 Color Correctors Ranked by What They Fix
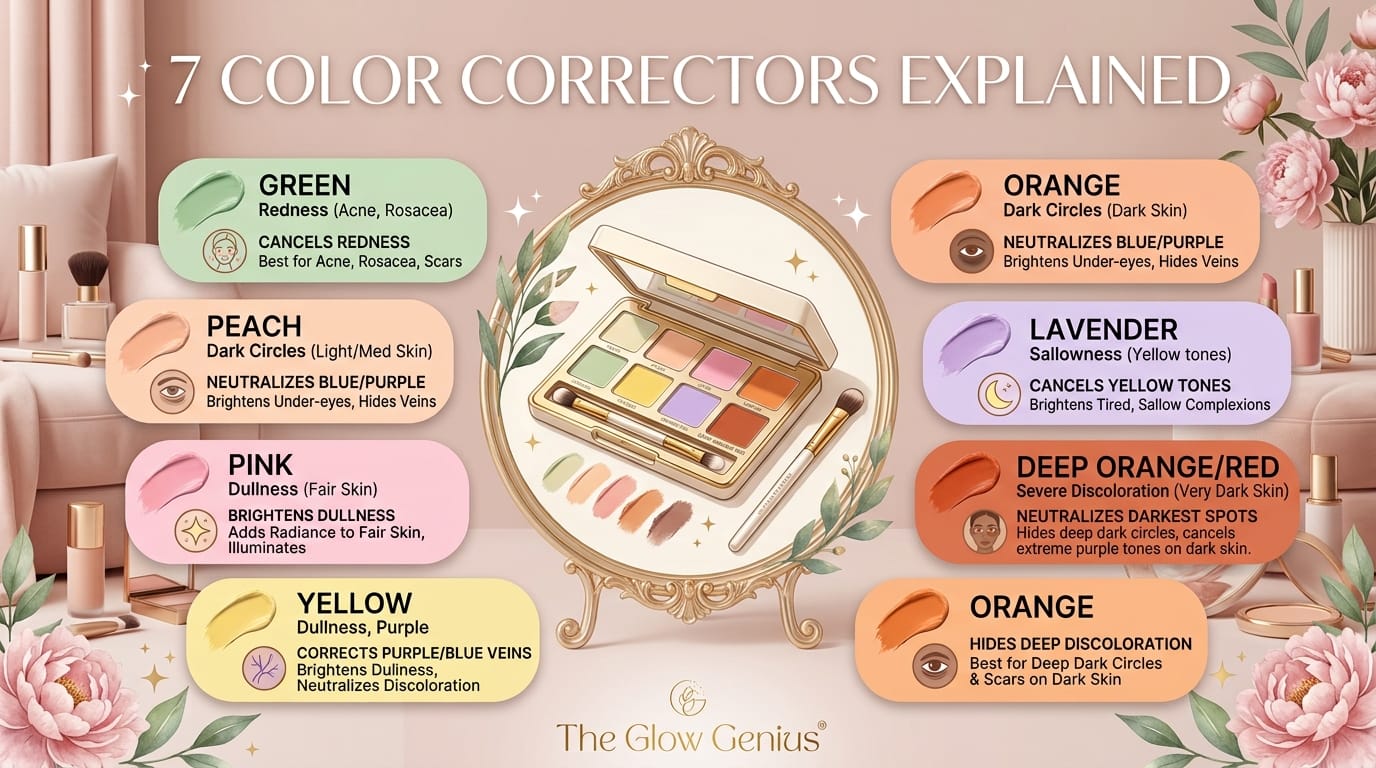
Below are the seven most common color corrector shades, what each one targets, and how to apply them correctly.
1. Green Corrector
Fixes: redness, acne, rosacea
Apply a thin layer directly onto red areas using a small concealer brush or your fingertip. Blend the edges gently so there is no visible line between the green and your surrounding skin.
Green correctors work best in small, targeted dots rather than a full-face layer, since most people only need correction on specific red zones like the nose, chin, or cheeks.
2. Peach Corrector
Fixes: dark circles, bruising, deep purple discoloration
Best suited for medium to deep skin tones. Apply in a thin triangle shape under the eye, extending slightly toward the temple, then blend with a damp sponge.
Peach correctors neutralise blue-purple undertones far more effectively than concealer alone on deeper skin tones, since concealer without correction often looks ashy in this area.
3. Orange Corrector
Fixes: very deep dark circles, deep discoloration
Best suited for deep skin tones with stubborn, dark under-eye discoloration. Apply and blend the same way as peach corrector, using a slightly more saturated shade for maximum cancellation.
This shade is often skipped by beginners, but it is essential for deeper skin tones where lighter correctors simply are not pigmented enough to do the job.
4. Salmon or Pink Corrector
Fixes: mild dark circles, fine lines
Suited for fair to light-medium skin tones. Apply a thin layer under the eyes and blend outward, avoiding heavy buildup in fine line areas.
Salmon correctors brighten mild discoloration without the heaviness of orange or peach shades, making this a good beginner option for lighter skin tones.
5. Yellow Corrector
Fixes: mild discoloration, mild dark circles, dark spots
Apply in a thin layer over mild dark spots or light under-eye discoloration, then blend well before applying concealer.
Yellow correctors work gently, making them a versatile option for beginners who are unsure whether they need a stronger peach or orange shade yet.
6. Lavender or Purple Corrector
Fixes: dullness, sallow or yellow-toned skin
Apply a thin, even layer across the areas where skin looks dull or yellow-toned, typically the center of the face, then blend thoroughly before foundation.
Lavender correctors are especially useful in winter months, when skin often looks duller due to less sun exposure and drier skin texture.
7. Red or Red-Orange Corrector
Fixes: deep bruising, dark under-eye circles on very deep skin tones
Apply sparingly in the deepest area of discoloration only, then blend the edges into surrounding concealer to avoid any harsh contrast.
This shade requires the most careful blending of the seven, since red-based correctors are the most pigmented and can look obvious if overapplied.
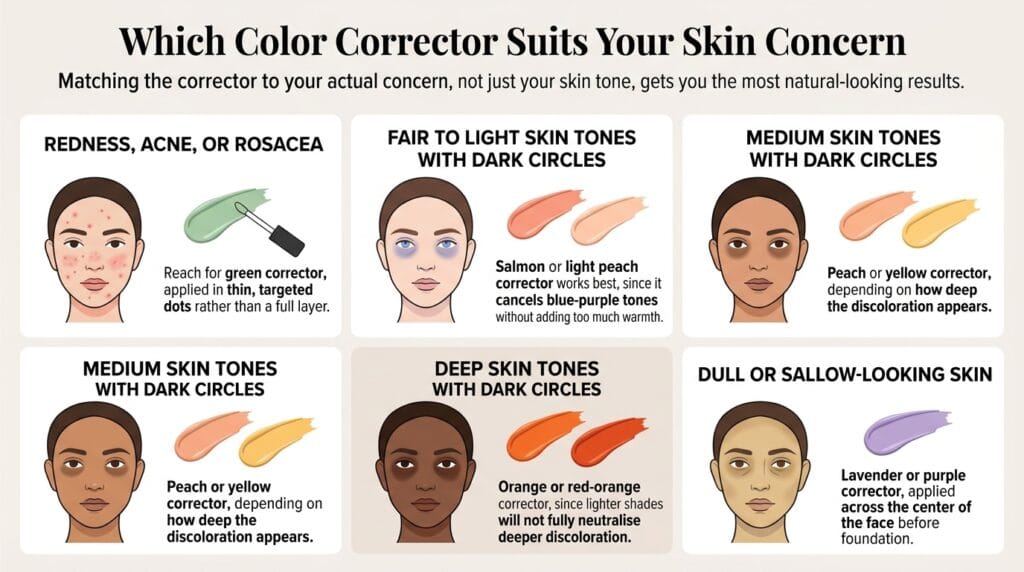
Which Color Corrector Suits Your Skin Concern
Matching the corrector to your actual concern, not just your skin tone, gets you the most natural-looking results.
- Redness, acne, or rosacea: Reach for green corrector, applied in thin, targeted dots rather than a full layer.
- Fair to light skin tones with dark circles: Salmon or light peach corrector works best, since it cancels blue-purple tones without adding too much warmth.
- Medium skin tones with dark circles: Peach or yellow corrector, depending on how deep the discoloration appears.
- Deep skin tones with dark circles: Orange or red-orange corrector, since lighter shades will not fully neutralise deeper discoloration.
- Dull or sallow-looking skin: Lavender or purple corrector, applied across the center of the face before foundation.
How to Apply Color Correcting Makeup — Step by Step
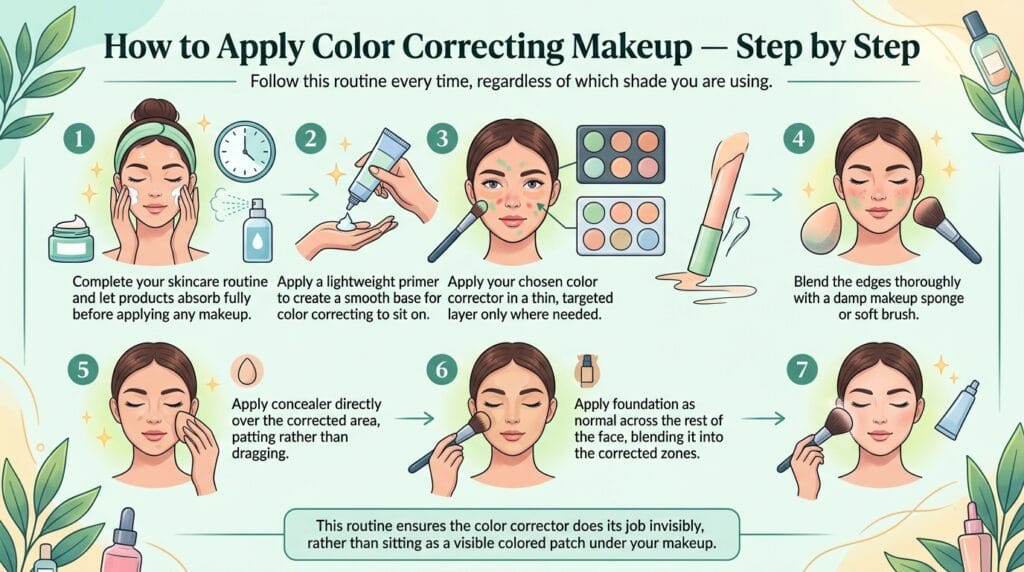
Follow this routine every time, regardless of which shade you are using.
- Complete your skincare routine and let products absorb fully before applying any makeup.
- Apply a lightweight primer to create a smooth base for color correcting to sit on.
- Apply your chosen color corrector in a thin, targeted layer only where needed.
- Blend the edges thoroughly with a damp makeup sponge or soft brush.
- Apply concealer directly over the corrected area, patting rather than dragging.
- Apply foundation as normal across the rest of the face, blending it into the corrected zones.
- Set with a light layer of translucent powder to prevent the corrector from shifting during the day.
This routine ensures the color corrector does its job invisibly, rather than sitting as a visible colored patch under your makeup.
Common Color Correcting Mistakes to Avoid
Honesty matters here, so let’s cover the mistakes that make color correcting look obvious instead of seamless.
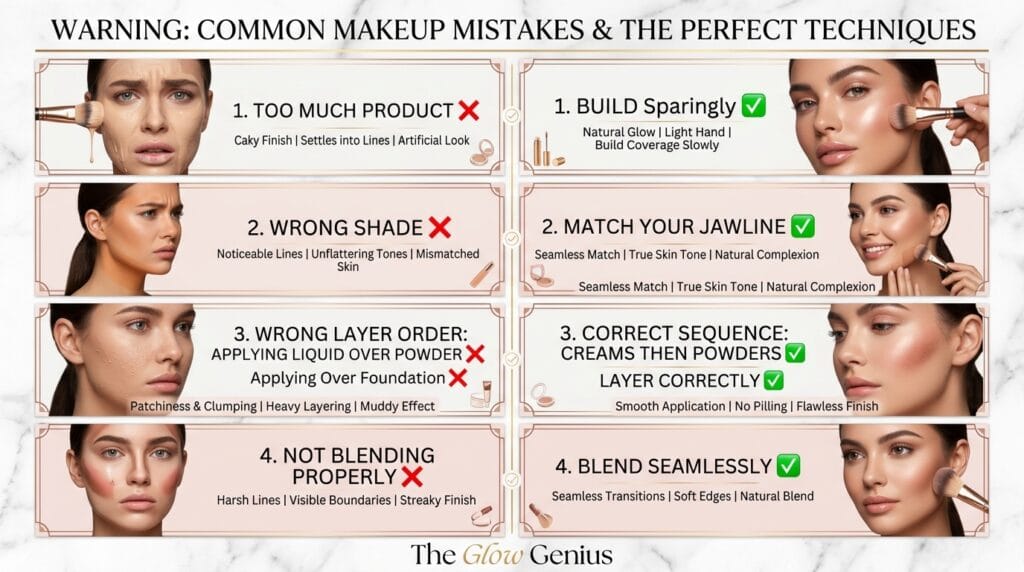
- Applying too much product is the single biggest mistake beginners make. A thick layer of any color corrector will show through foundation, no matter how well it is blended.
- Skipping the blend step leaves a visible edge between the corrector and your natural skin tone, which becomes more obvious in photos and direct light.
- Using the wrong shade intensity for your skin tone means the corrector either does not fully cancel the discoloration, or it creates a new, unnatural tint under your foundation.
- Applying corrector over foundation instead of under it defeats the entire purpose, since correctors are designed to be neutralised by the concealer and foundation layered on top.
Color Correctors at a Glance
Shade | Fixes | Best Skin Tone | Application Area |
|---|---|---|---|
Green | Redness, acne, rosacea | All skin tones | Targeted red zones |
Peach | Dark circles, bruising | Medium to deep | Under-eye triangle |
Orange | Deep dark circles | Deep skin tones | Under-eye area |
Salmon/Pink | Mild dark circles | Fair to light-medium | Under-eye area |
Yellow | Mild discoloration, dark spots | All skin tones | Spot treatment |
Lavender/Purple | Dullness, sallow tone | All skin tones | Center of face |
Red/Red-Orange | Deep bruising | Very deep skin tones | Targeted dark zones |
You May Also Like
If you loved this guide, these articles were made for you:
- 5 Flawless Foundation Hacks for a Long-Lasting Glow
- 7 Concealer Hacks
- How to Choose the Right Foundation Brush
- Best Makeup Primers and Setting Sprays for All-Day Glow
- No-Makeup Tips for Beginners
- 40 Pro Makeup Tips That Work
- Viral Makeup Hacks Taking Over TikTok
- 8 Daily Glow-Up Guide for Radiant Skin and Natural Beauty
FAQs
The Honest Verdict on Color Correcting Makeup
Color correcting makeup genuinely works when you understand the color theory behind it and apply the correct shade in a thin, well-blended layer. It is not a magic step, but a targeted tool for specific concerns.
Match your shade to your actual concern first, then to your skin tone. A green corrector will not help dark circles, just as a peach corrector will not help redness.
Practice the application order, keep layers thin, and always blend the edges. Once the technique clicks, color correcting becomes one of the most reliable tools in a beginner’s makeup routine. Save this guide, and come back whenever you need a shade refresher.