DIY Button Hacks: 7 Viral Pinterest Trends You Can Try at Home (No Sewing Needed!)
DIY button hacks are quietly taking over Pinterest — and they’re officially the easiest craft trend of 2025. From button nail art to upcycled sweaters, aesthetic journal covers, and handmade hair accessories, buttons have gone from boring fasteners to the it-accessory of the season.
Pinterest’s own editors have flagged the “Button Up!” movement as an emerging editors’ pick, with the keyword “button nails” growing over 20% month-on-month. And the best part? Unlike most trending DIY crafts, you don’t need a single sewing skill — or even a needle — to jump in.
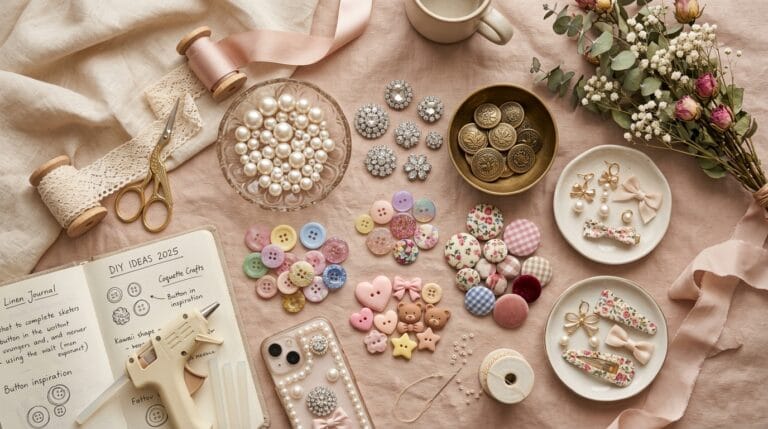
Whether you’ve got a jar of vintage buttons sitting in a drawer or you’re ready to grab a fresh assortment, these 7 DIY button hacks will transform everyday items into something seriously Pinterest-worthy. Every single one is beginner-friendly, budget-conscious, and doable in under 30 minutes.
This post contains no affiliate links. Product recommendations in this article are based solely on editorial merit. For product buying links, see our companion shopping guide.
What Is the “Button Up!” Trend and Why Is Everyone Doing It?
The “Button Up!” trend is a Pinterest-certified movement where people use buttons — both vintage and new — to personalise, upcycle, and decorate everything from clothing and accessories to tech gadgets and stationery. It sits perfectly at the intersection of three major 2025 cultural forces: sustainable fashion, DIY personalisation, and the coquette aesthetic.
What makes this trend so sticky is its accessibility. Buttons cost almost nothing, require minimal tools, and produce results that look genuinely high-effort. Celebrity stylists and fashion editors have already started placing buttons on runway pieces — but the DIY community on Pinterest and TikTok is doing it better, faster, and for free.This is also deeply connected to the upcycled clothing movement, which is projected to command a 23% share of the global fashion market by 2030. Adding buttons to old garments isn’t just cute — it’s a genuinely sustainable fashion choice
💡 TheGlowGenius Mentor Tip: Before buying anything, raid your home first. Old jackets, grandmothers’s sewing boxes, thrift store finds — vintage buttons are everywhere and they’re free. The most character-rich DIYs use mixed, mismatched sets.
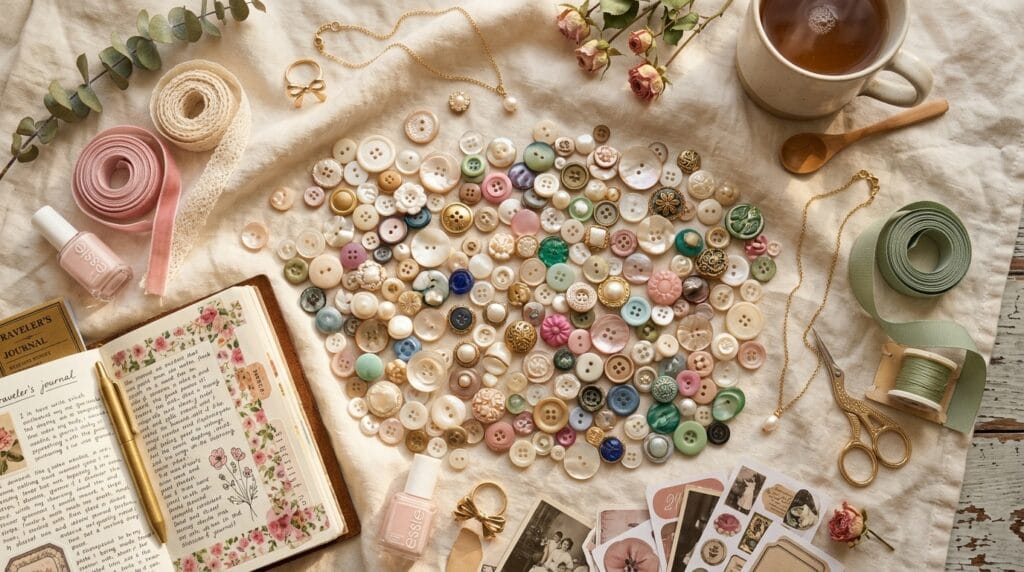
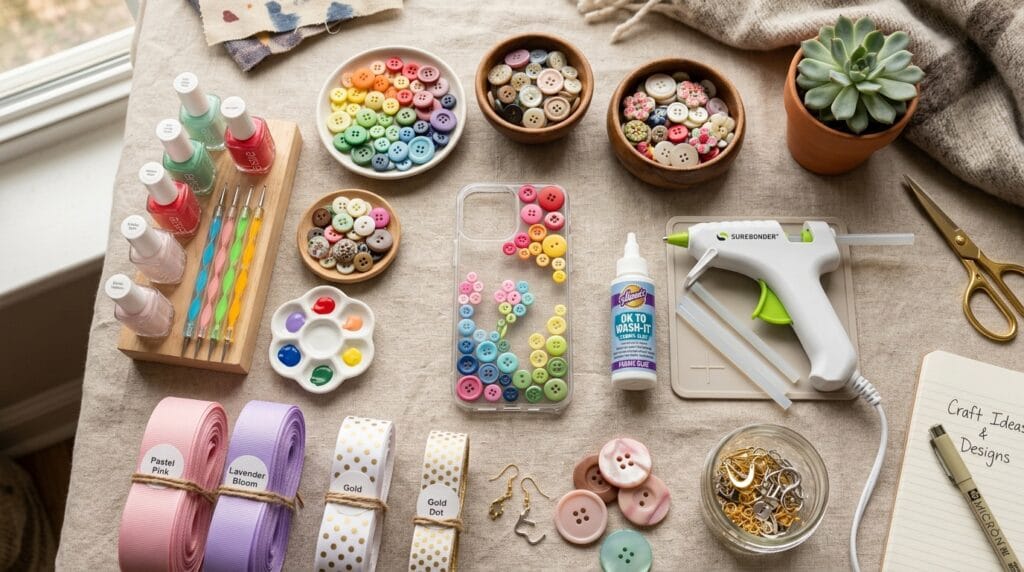
What You Need for These DIY Button Hacks
- Buttons — vintage mixed set, pearl buttons, or cute kawaii-style buttons
- Hot glue gun + glue sticks — the single most useful tool for all 7 hacks
- Fabric glue / no-sew adhesive — for clothing hacks without a needle
- Nail dotting tool (or a toothpick / bobby pin) — for button nail art
- Base coat + nail polish + top coat — any brand works
- Earring hooks + jump rings — for the earring hack
- Epoxy resin or strong clear-drying jewelry glue — for the phone case and earrings
No sewing needle, no sewing machine, no experience required. Let’s get into the hacks.
The 7 Best DIY Button Hacks to Try Right Now
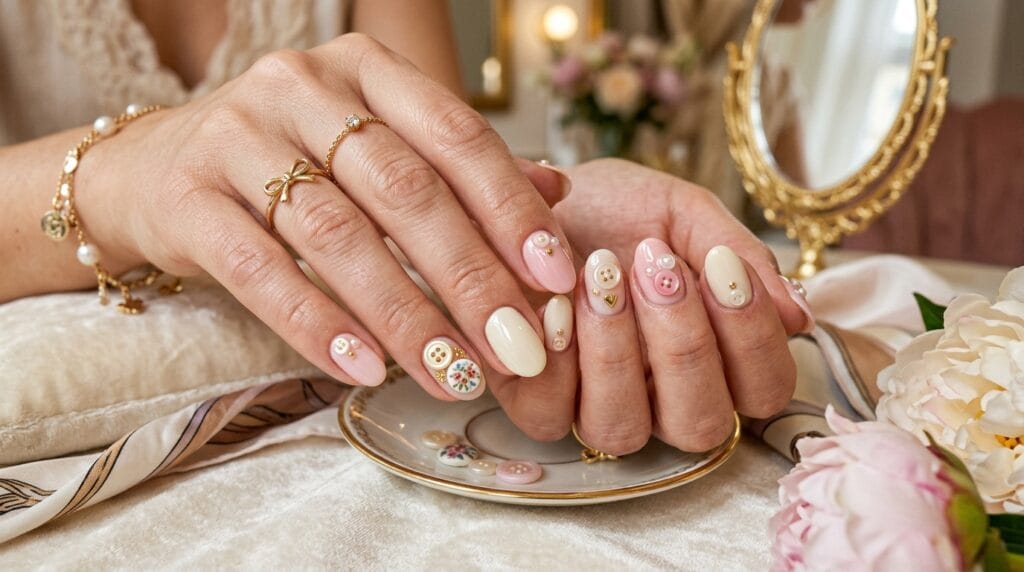
Button Nail Art — The Easiest Trending Manicure of the year
Button nail art is the hottest nail art trend coming out of the “Button Up!” movement. The design mimics a real button on your nail — a small circle with four tiny holes — and it looks incredibly detailed despite being one of the simplest nail art techniques to master.
You do not need builder gel or a UV nail lamp for this version. This beginner-friendly method uses only regular nail polish and a dotting tool.
What you need:
- Nail polish — nude, pink, or any base colour
- Contrasting nail polish for the button dots
- Nail dotting tool (or toothpick / bobby pin)
- Base coat and top coat
Step-by-step tutorial:
- Apply a base coat and let it dry fully.
- Paint your base colour — 2 coats. Nude pink, soft white, or pastel tones work best for the button look.
- Load your dotting tool with a contrasting colour — white on pink, black on cream, pink on nude.
- Create four small dots in a square formation near the centre of the nail, mimicking the four holes of a button. Keep spacing even.
- Add a thin ring outline around the four dots using the dotting tool or a thin nail art brush to define the button’s edge.
- Seal with top coat once everything is dry.
💡 Pro Tip: For a 3D effect without gel, apply 3–4 layers of the dot colour, letting each one dry. This builds height and makes the dots look raised and tactile — exactly like a real button.
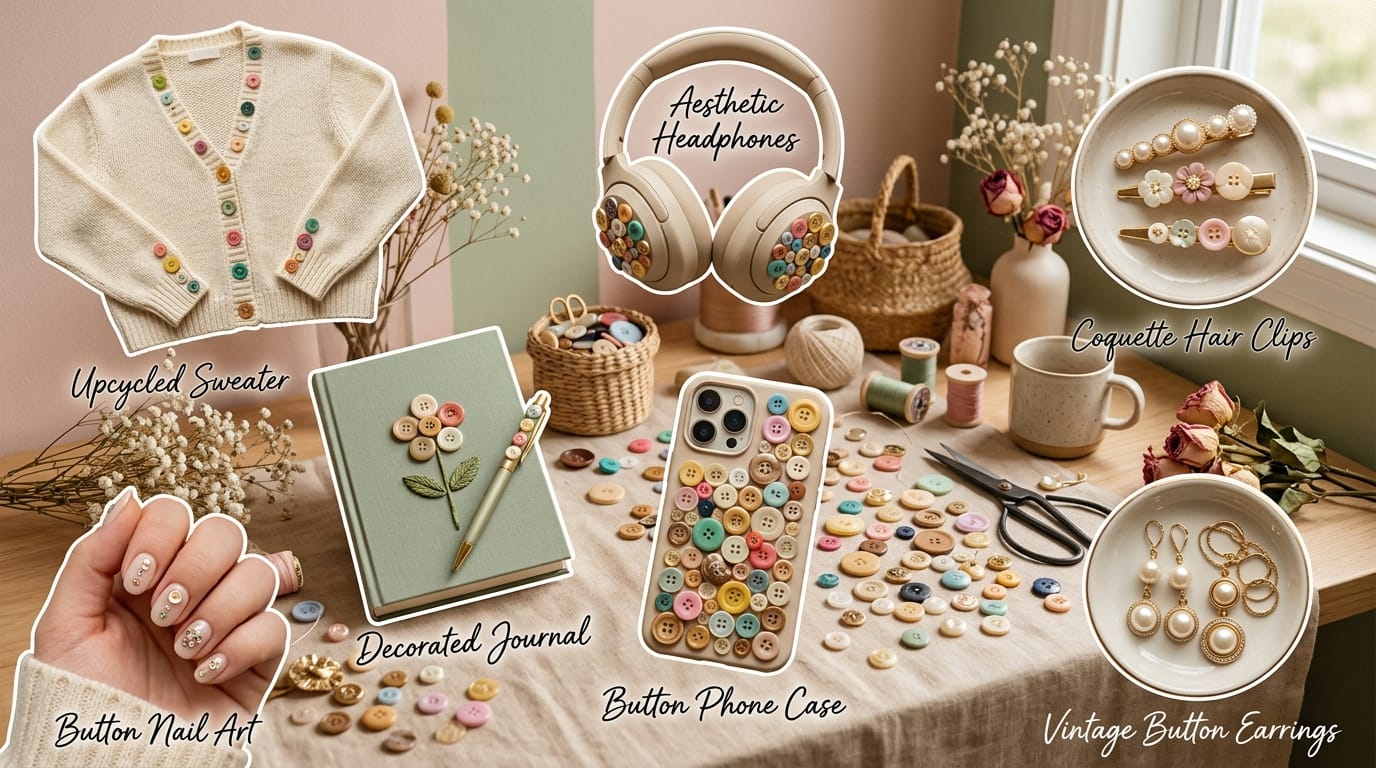
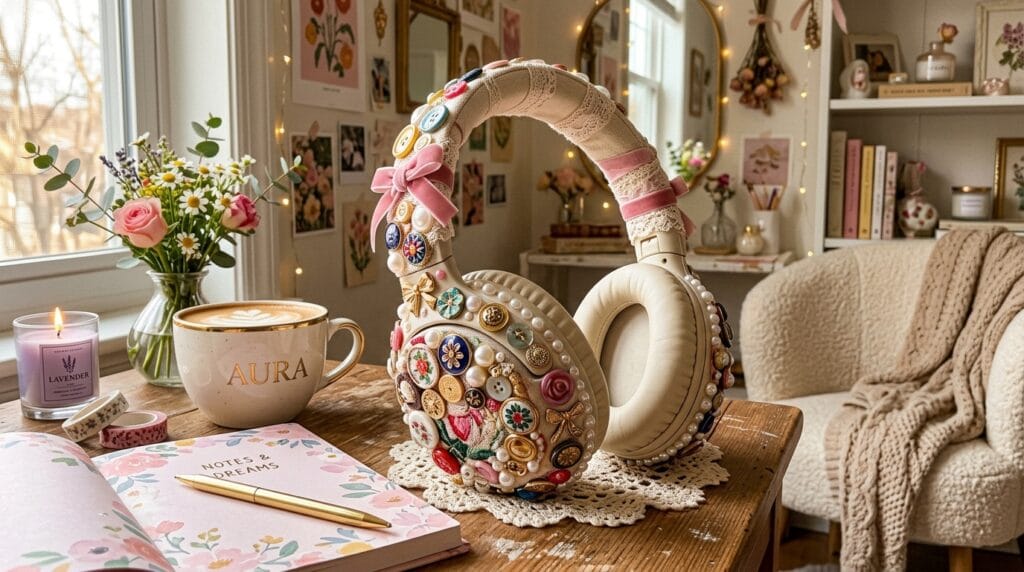
Button-Adorned Headphone Makeover
Aesthetic over-ear headphones decorated with colourful or vintage buttons are one of Pinterest’s most-saved “Button Up!” images. This hack transforms a basic pair of headphones into a personalised style statement — perfect for the coquette or cottagecore aesthetic.
What you need:
- Plain over-ear headphones (any colour, but black or white show buttons best)
- Assorted buttons — mix of sizes and colours, or a themed set (all pearl, all pastel, etc.)
- Hot glue gun + glue sticks
- Tweezers for precise placement
Step-by-step:
- Plan your layout first — lay buttons on the headband without gluing to visualise the pattern. Clustered arrangements or straight lines both work beautifully.
- Heat your hot glue gun. Apply a small bead of hot glue to the flat back of each button.
- Press firmly onto the headphone headband and hold for 10 seconds.
- Continue until your pattern is complete. Leave the earpad rims clean — buttons there can be uncomfortable.
- Allow to set for 30 minutes before wearing.
💡 Pro Tip: Mix large focal buttons with tiny filler buttons around them — it creates a jewellery-like layered effect that looks polished and intentional.
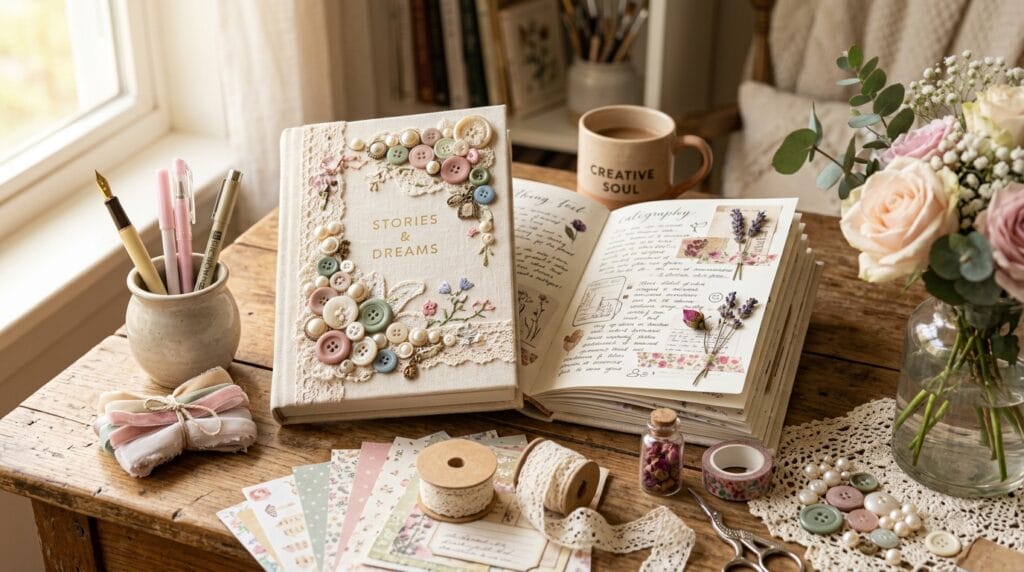
Aesthetic Button Journal / Diary Cover
Button-decorated journal covers are one of the top-performing Pinterest DIY images in the “Button Up!” trend. They combine the journaling aesthetic with the crafts movement — and the result is a notebook that feels genuinely one-of-a-kind. This is perfect for your daily planner, diary, or sketchbook.
What you need:
- A plain hardcover notebook or journal
- Assorted buttons — vintage mixed works best for aesthetic variety
- Hot glue gun + glue sticks
- Optional: fabric or scrapbook paper as a base layer under the buttons
Step-by-step:
- Optional background: Cut a piece of fabric, scrapbook paper, or felt to cover the notebook and glue it down first for a textured base.
- Arrange your buttons in a pattern on the cover before gluing — try a corner cluster, a full border, or a heart shape using buttons of similar size.
- Glue each button using your hot glue gun, pressing firmly. Start from the center of your pattern and work outward.
- Fill any gaps with small filler buttons or seed beads for a finished look.
- Optional: Seal the whole cover with Mod Podge for extra durability and a slight sheen.
💡 Pro Tip: This is one of the most-saved DIY craft hacks in the Pinterest editors’ picks — and it takes under 30 minutes.
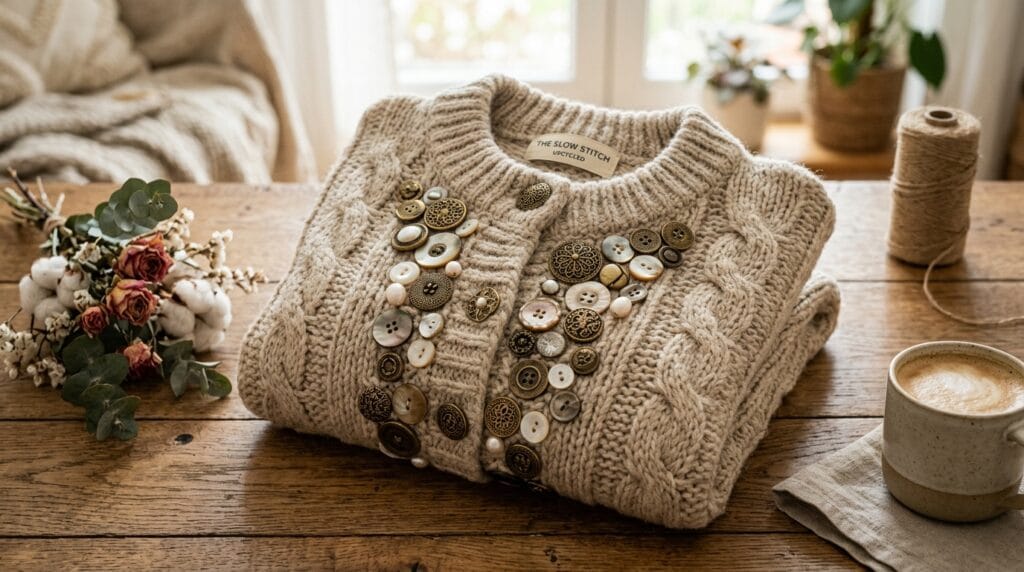
Upcycled Sweater — The No-Sew Button Clothing Hack
This DIY fashion hack is at the heart of the upcycled clothing movement — and it’s the one Pinterest’s editors specifically called out as a trend to watch. Taking a plain or tired-looking sweater and adding buttons transforms it into something that looks intentionally styled and runway-ready.
Best of all, you need zero sewing skills. Fabric glue (specifically a no-sew iron-on type like Aleene’s Fabric Fusion) is strong enough to hold buttons through normal wear and washing.
What you need:
- A plain sweater, cardigan, or jacket
- Fabric glue or iron-on adhesive (Aleene’s Fabric Fusion is the gold standard)
- Assorted buttons — large statement buttons work best on collars; smaller ones on cuffs
- Pins or masking tape to hold buttons in place while glue dries
Step-by-step:
- Choose your placement — collar edges, sleeve cuffs, pocket rims, and down the front button band are all high-impact areas.
- Apply a small amount of fabric glue directly to the flat back of each button. Less is more — excess glue shows through light fabrics.
- Press firmly onto the sweater and pin or tape in place. Buttons need to stay completely still for at least 2 hours.
- Leave to cure for 24 hours before wearing or washing for maximum hold.
💡 Hack within the hack: Replace all the plain buttons on a charity-shop cardigan with vintage pearl or brass buttons. This single swap transforms a £2 find into something that looks designer. This is called “re-buttoning” and it’s one of the most elegant sustainable fashion moves you can make.
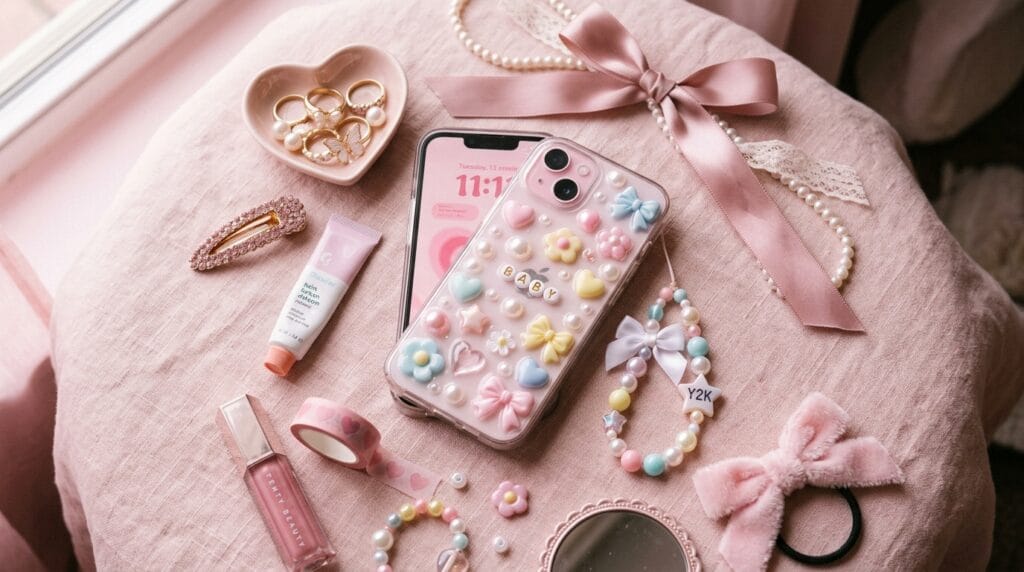
DIY 3D Button Phone Case Decoration
Button-decorated phone cases are one of the newest “Button Up!” expressions on Pinterest and TikTok. A clear acrylic phone case filled with buttons (or decorated on the outside) turns your phone into a wearable accessory — and it fits perfectly into the Y2K aesthetic, coquette aesthetic, and cottage-core trends.
What you need:
- Clear silicone or hard plastic phone case
- Flat-back buttons — must be thin enough to sit flush
- Epoxy resin (for inside-the-case method) OR strong clear-drying jewellery glue (for outside decoration)
- Toothpick for precise placement
Step-by-step (outside decoration method — easiest):
- Clean your phone case with rubbing alcohol so the glue adheres properly.
- Arrange buttons on the case before gluing — try a corner cluster, scattered placement, or a border pattern along the edges.
- Apply a small dot of jewellery glue or epoxy to each button’s flat back.
- Press firmly and hold for 30 seconds. Use a toothpick to remove any excess glue immediately.
- Leave to cure for 4–6 hours before inserting your phone.
💡 Pro Tip: The inside-the-case resin method (filling a clear case with buttons in resin) is more advanced but produces a truly stunning result — we’ll cover that in a dedicated tutorial soon.
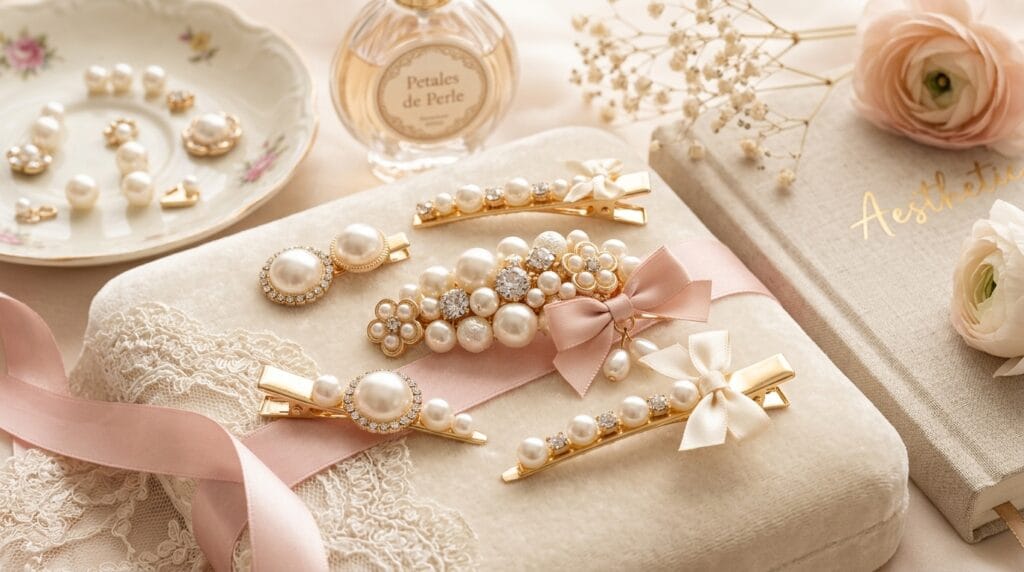
DIY Button Hair Clips — Coquette Aesthetic Accessory
Button hair clips are one of the most achievable DIY hair accessories from the “Button Up!” trend. They slot perfectly into the viral coquette aesthetic — all ribbon, bows, pearls, and feminine details. A set of matching button clips takes 10 minutes to make and looks like something from a boutique.
What you need:
- Plain alligator hair clips (available in bulk packs)
- Pearl buttons, vintage fabric-covered buttons, or rhinestone buttons for maximum coquette effect
- Hot glue gun + glue sticks
- Optional: thin ribbon to wrap the clip before attaching the button for extra texture
Step-by-step:
- Optional ribbon wrap: Cut a thin strip of satin ribbon and hot-glue it around the flat top of the alligator clip for a polished base.
- Apply a bead of hot glue to the back of your chosen button.
- Press firmly onto the top of the alligator clip and hold for 15 seconds.
- Layer 2–3 buttons of different sizes for a cluster effect — one large statement button with two small ones flanking it.
- Allow to set for 20 minutes before using.
💡 Style tip: Make a matching set of 4–6 clips using the same button type for a coordinated, editorial look. Pearl buttons + cream ribbon clips = instant Pinterest-worthy hair styling.
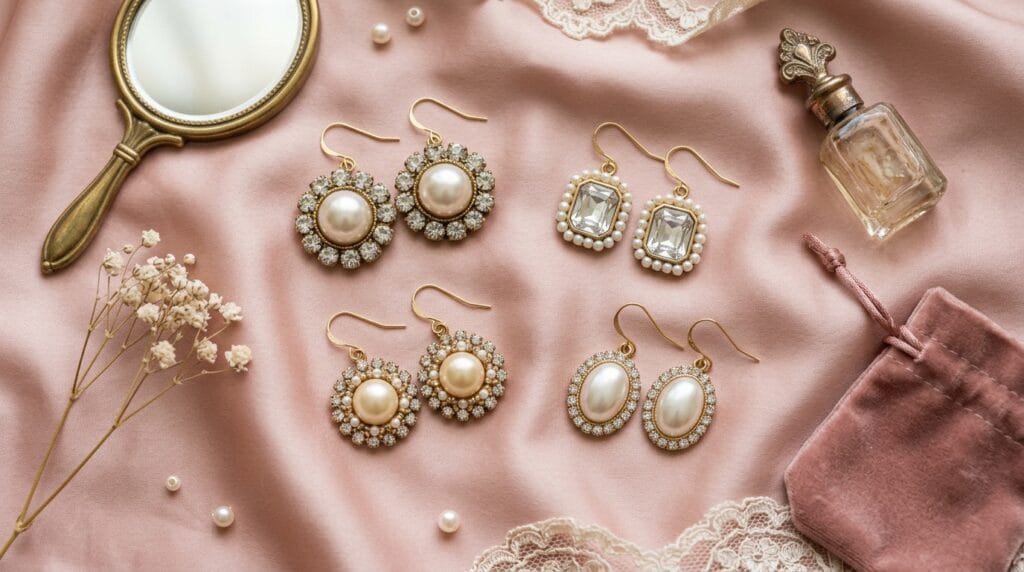
DIY Button Earrings — Zero-Cost Statement Jewellery
This is arguably the most wearable DIY button hack on the list — and the one with the highest “people will ask where you got these” factor. Button earrings made from vintage buttons look genuinely beautiful, cost almost nothing, and can be made in under 15 minutes. They’ve been a staple of sustainable fashion and DIY jewellery communities for years — but the “Button Up!” The trend is bringing them squarely into the mainstream.
What you need:
- Flat-back buttons — vintage, pearl, or rhinestone work best
- Earring hooks (fish hook or lever-back style)
- Jump rings (small metal rings that connect the button to the hook)
- Jewellery pliers (or two pairs of regular pliers in a pinch)
- Strong clear-drying jewellery glue OR epoxy clay for buttons without a shank hole
Step-by-step — for buttons with a shank (loop on the back):
- Open a jump ring using two pairs of pliers — pull one side toward you, one away. Never pull apart sideways.
- Thread the jump ring through the button shank.
- Thread the earring hook onto the same jump ring.
- Close the jump ring firmly. Your button earring is done.
Step-by-step — for flat-back buttons (no shank):
- Mix a small amount of epoxy clay and press it onto the back of the button.
- Push a jump ring into the epoxy clay at the top centre before it cures.
- Allow to cure for 2–3 hours, then attach your earring hook via the jump ring.
💡 Best button types for earrings: 2-hole flat buttons work beautifully as they sit face-forward. 4-hole buttons can be threaded for a “sewn on” look that adds extra detail. Large statement buttons (20–25mm) make dramatic drop earrings; small 10–12mm buttons make elegant studs.
5 Things Nobody Tells You About DIY Button Hacks (Read Before You Start)
Avoid the most common beginner mistakes with these honest tips from the TheGlowGenius team:
- Test your glue before committing. Hot glue doesn’t adhere well to very smooth, glossy surfaces. If you’re decorating a phone case or headphones, test one button first and let it cure fully.
- Flat-back buttons are easier than shank buttons for beginners. Shank buttons have a loop at the back which is great for earrings but makes them harder to glue flat.
- For nail art, always use a top coat. The dotting technique is only durable if sealed with a strong gel-finish top coat. Without it, the raised dots chip within 24 hours.
- Vintage buttons can be fragile. Very old buttons — especially shell or corozo buttons — can crack under too much hot glue pressure. Use jewellery glue instead for delicate pieces.
- Mix materials for the best aesthetic result. The most Pinterest-worthy button DIYs combine different button types — pearl, wood, rhinestone, fabric-covered — in one design. Don’t use all the same.
Where to Find the Best Buttons for These Hacks
Best sources (start here):
- Old clothing you’re no longer wearing — cut the buttons off before donating
- Charity shops and thrift stores — always check the sewing/craft section
- Grandmother’s sewing box — genuinely the best vintage finds are there
- Facebook Marketplace / local swap groups — bulk lots often go for pennies
Best places to buy:
- Amazon — search “vintage mixed button assortment” for a 300–500 piece set; great for beginners starting their collection
- AliExpress — unbeatable range and price for specific types (pearl buttons, kawaii shapes, rhinestone sets). Allow 2–3 weeks delivery
- Hobbycraft / Etsy — for specific vintage or handmade button styles
Ready to shop? We’ve put together a complete button buying guide with our top Amazon and AliExpress picks
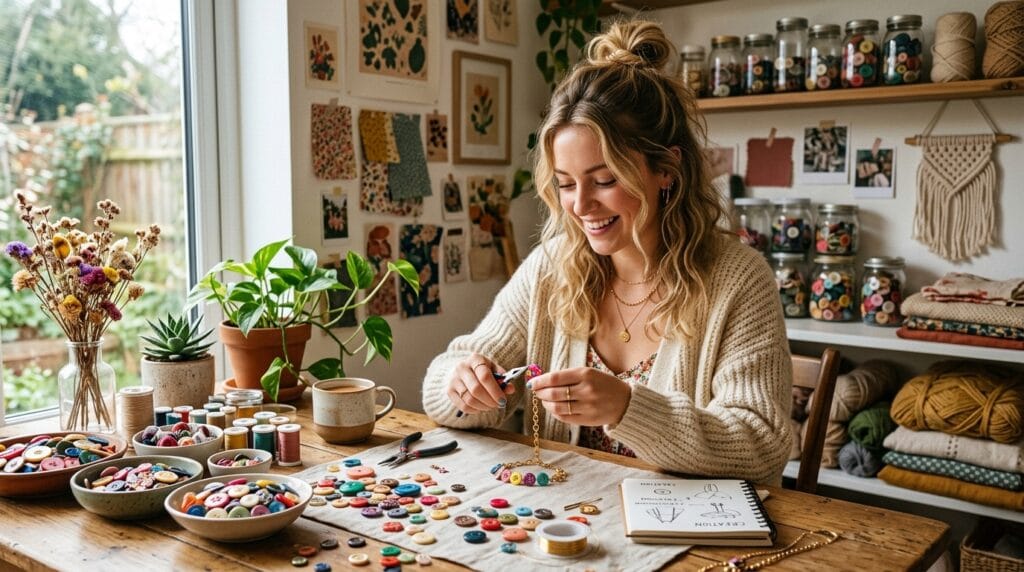
Final Thoughts — Why DIY Button Hacks Are Worth Trying
The “Button Up!” trend is one of those rare Pinterest moments where the craft is genuinely as easy as it looks — and the results are genuinely as good as they appear. Whether you start with button nail art (literally 15 minutes and tools you already own) or go straight for a full sweater upcycle, every single one of these hacks delivers something that looks intentional, personal, and beautifully on-trend.
What we love most about DIY button hacks is that they sit at the intersection of three things that matter right now: creative self-expression, sustainable fashion choices, and budget-friendly beauty. For this you don’t need expensive supplies and talent. You just need buttons — and most of us have those already.
Pick one hack, try it this weekend, and tag us on Pinterest or Instagram @theglowgenius — we’d love to see what you create. 🪡✨