Best Starter Nail Kits for Beginners — Salon Results at Home
If you’ve ever scrolled through Pinterest, TikTok, or Instagram and thought, “I wish I could do nails like that,” and when you start, you have no tools and accessories, and you start with polish, and also end up with it. Then this post is for you. 💅 These tried-and-tested Best Starter Nail Kits for Beginners are loved by beauty bloggers and also by beginners because you will recreate professional and salon-worthy nails easily at home. No matter if you’re a student, a busy mom, or a beauty lover on a budget, you’ll find a kit here that fits your vibe.
The kits I will suggest will help you to create stunning looks without professional skills. Because in this kit, you’ll get gel sets with UV lamps and nail art kit tools. After buying the kits, we will suggest you don’t need more expensive appointments or messy fails — just cute nails, made simple.
🧠According to a board-certified Nail tech: Choose a beginner nail kit that includes the right basic tools—because a fancy lamp is nothing without good prep. The real power move is in the prep.
🧰 What’s a Beginner Nail Kit have?
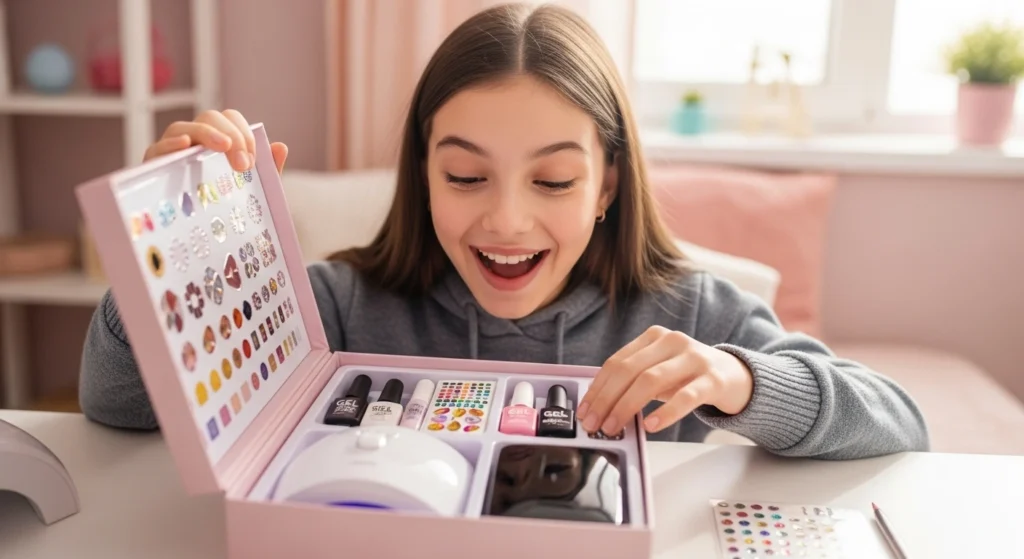
Opening your first nail kit with the question “What’s inside a beginner nail kit”? It’s just like an unboxing of a mini science lab. Because inside a kit, there are so many little tools, and mysterious liquids are waiting for you. If you’re a total newbie, don’t worry. I give a short intro and use of the tool, which is in a beginner nail kit, and also tell you why each thing matters. From shaping to top coats, we’ve broken it all down—so you know exactly what you’re getting. Let’s decode the kit so you can start painting like a pro.
- 🖇️ Nail Filer and Buffer: It is used to shape your nail and smooth your nail surface. This tool also helps polish to stay long on your nails and prevents your nails from chipping.
✨ Bonus benefit: Always file your nail in one direction, not in a zigzag, to avoid breakage.
- ✂️ Nail Clippers & Scissors: It is used to cut or trim long nails. This tool helps you get clean nails without any uneven edges.
- 🌸 Cuticle Pusher or orange Stick: With the help of this tool, you push your cuticle back. This is the professional step to make your polish look neat and clean.
✨ Bonus benefit: Use a wooden cuticle pusher or orange stick to push your cuticle if you’re a beginner, because it’s skin-friendly.
- 🎨 Base Coat + Top Coat: Base Coat grips the polish and prevents your nails from stains. While the top coat seals everything in and gives that glossy (or matte) finish. If you skip this step, then this means you skip the most important and basic step.
- 💅 Nail Polish or Gel Colors: This tool varies with the different brand kits because some have regular polish, and others have gel (which needs a lamp).
- 💡 UV/LED Lamp (for Gel Kits Only): This tool comes with a gel kit only and is used to dry gel polish fast, and the secondary function of this lamp is to prevent your nail polish from chipping. If you use gel polish, then you must have a UV/LED Lamp because without this, the gel polish won’t set.
⚠️ If you buy a gel kit, then double-check for uv lamp because not all starter kits have a lamp.
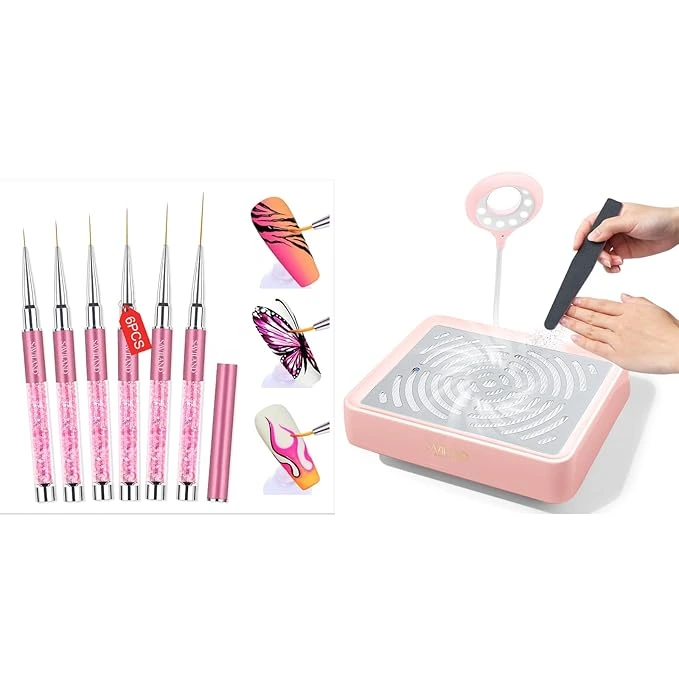
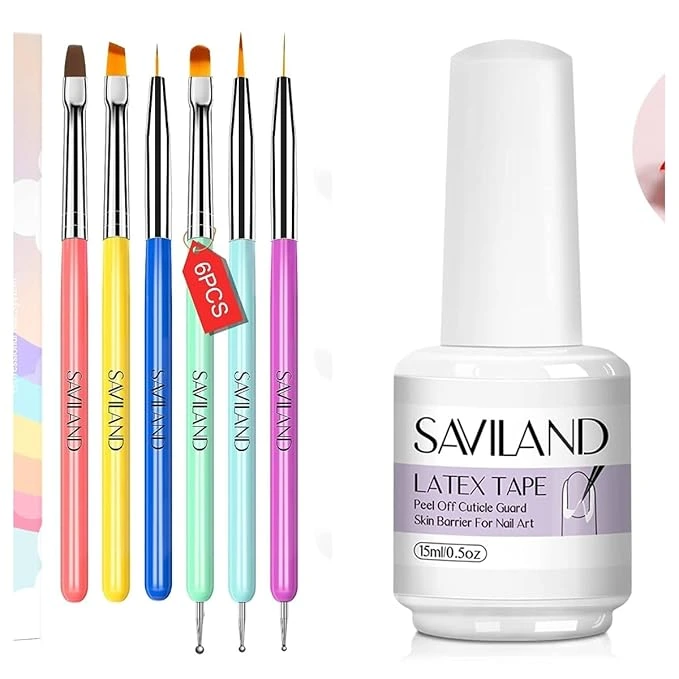
- 🖌️ Brushes, Stickers, or Dotting Tools (in nail art kits): This tool is your manicure baddie 💅. With the help of this tool, you create different nail designs like polka dots, stripes, florals, and so on. These tools are just available in the art kit.
- 🧴 Cleanser Wipes or Alcohol Pads (in gel kits): This tool also comes with gel kits because, without this tool, your gel kit is incomplete. This tool is used to wipe off the sticky layer after the curing gel. If you skip this step, your nails will not look ok, not cute, and professional. This tool is just available in the gel kit.
✨ Bonus benefit: Don’t purchase the kit that skips base/top coats, which gives you 12 colors but no tools, because quantity ≠ quality.
Beginner Nail Kit Checklist
- UV/LED Lamp
- Base & Top Coat
- Nail File & Buffer
- Cuticle Pusher
- Nail Tips / Forms (Optional)
- Gel or Acrylic Kit
- Nail Art Tools (Optional)
🛍️ Best Starter Nail Kits for Beginners
Not all starter nail kits have the same tools; some kits have total game-changer tools, others do not. These starter kits are beginner-friendly and budget-friendly. Whether you’re into classic polish, gel glam, or artsy nail stickers, there’s something here for every kind of newbie. We’ve broken it down with pros, cons, and best use cases — so you can shop smart and slay even smarter. Let’s find your perfect first kit.
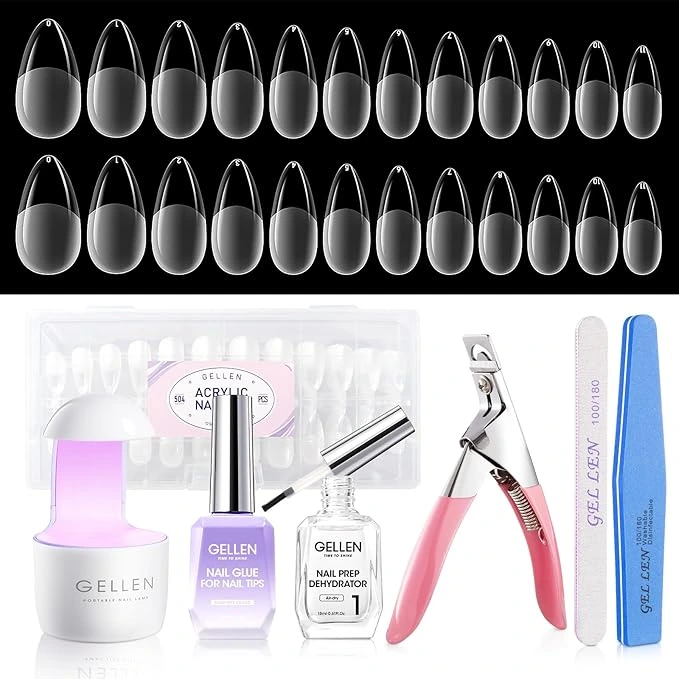
🥇 Beetles Gel Starter Nail Kit for Beginners
This kit comes with full-cover nail tips, a UV gel adhesive, and a mini UV/LED lamp — everything you need to try gel extensions at home without the stress. It’s super beginner-friendly and gives you that salon look without the salon price tag.
✨ Best for: Newbies who want to try gel extensions at home without dropping cash on pro tools.
Best Product Picks:
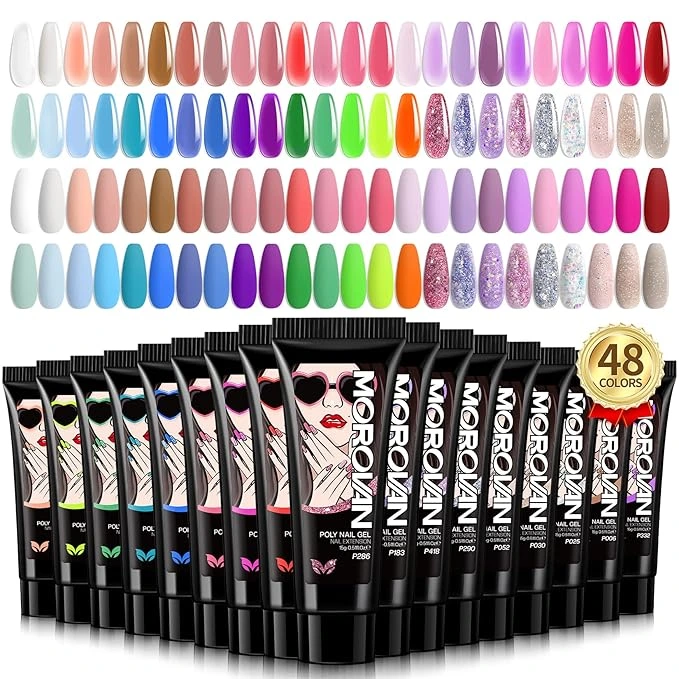
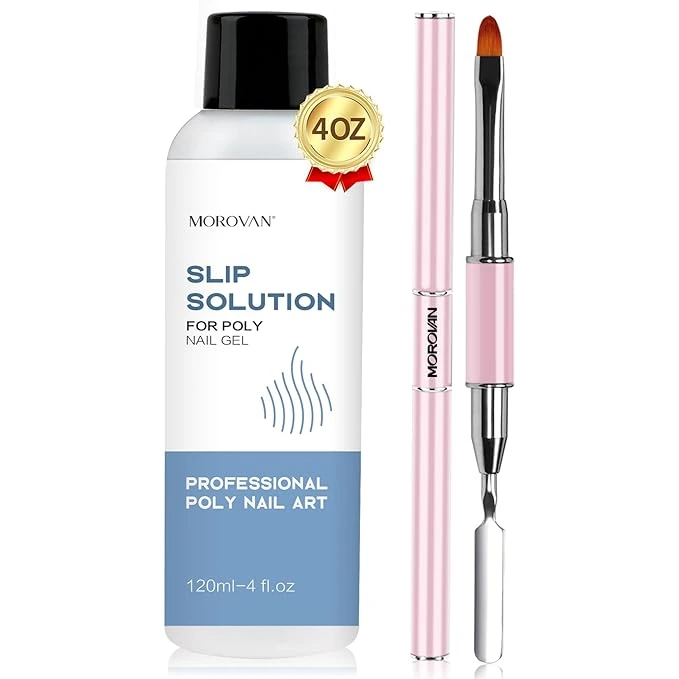
2. Best Morovan Poly Gel Starter Nail Kit for Beginners
This kit is best for beginners who want nail extensions, tools, and polish, all in one starter kit. Its price is around $30–40 on Amazon.
What Users Say about this kit:
- “I’m a total beginner … this kit came with everything I needed … nails stayed for 3 weeks!”
- “Yes, I bought some, and it’s pretty good… consistency is perfect for me, and the colors are so
Best Product Picks:
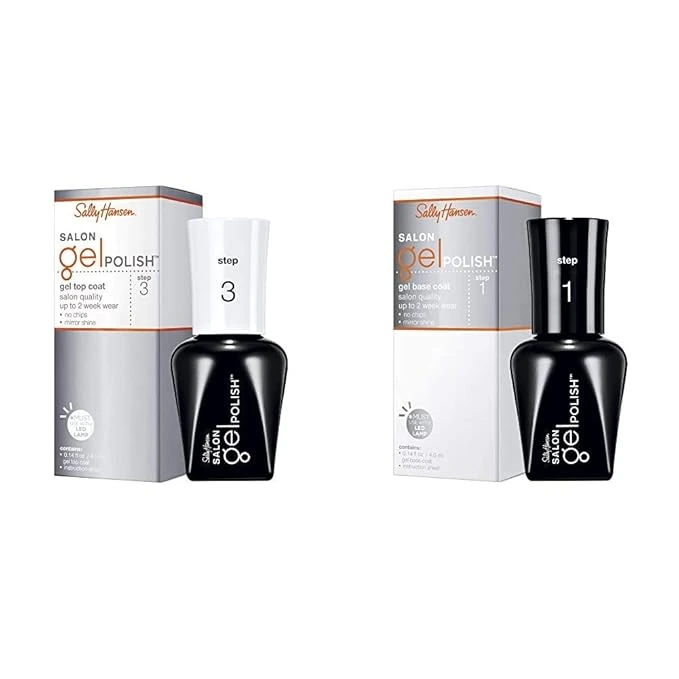
3.Sally Hansen Gel Starter Kit for Beginners
This kit is by Sally Hansen, this is ideal for a newbie who is looking for simplicity and salon-like results at home. Its approximate price is $40–45 on Amazon.
This starter nail kit has an LED lamp with an auto timer (30s default), gel polish (single shade), base coat & top coat, cleanser pads, cuticle stick, nail file & buffer, instruction booklet — especially helpful for beginners.
It is perfect for beginners or anyone who just wants simple, one-shade gel nails at home — no drama, no mess. It’s also great for DIY who love clean, quick results without loading up on extra tools.
Nail Kit Tips from Real Users:
- “I got better results when I was under the lamp for at least 90 seconds. It helps a ton if you buff the nail…”
- “You start with buffing, then dehydrate the nail, apply base, cure for a minute, color polish, cure for a minute, and finally no‑wipe top coat and cure 90 sec up to 2 minutes. Never used Sally Hansen, but even cheap gel polishes never chipped on me if you follow all the steps.”
Best Product Picks:
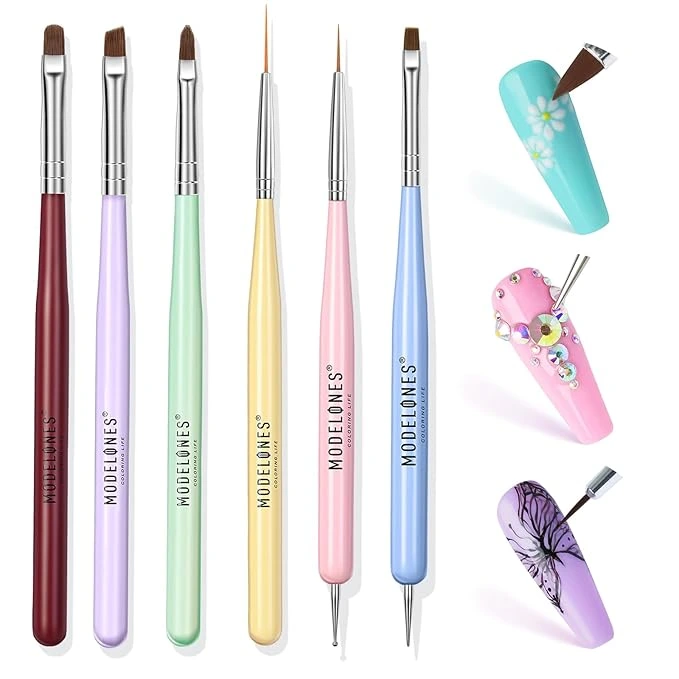
4. Modelones Creative Starter Nail Art Kit for Beginners
This kit is by Modelones, which is perfect for beginner nail art fun without buying separate tools. Its approximate price is $35–45.
This nail kit includes a Mini UV lamp, multiple gel polish shades, base coat & no-wipe top coat, nail art brushes, dotting tools, rhinestones & stickers, nail glue, file, buffer, cuticle stick, and instruction guide.
This kit is absolutely for beginners who love colorful nail art and want hands-on tools. And for DIY lovers craving the flexibility to try stamping, gems, dots, and glitter without buying separate supplies.
User Feedback:
- Many comment that the kit is “excellent value” and that nails last “up to two weeks” with proper curing.
- Some mention the mini lamp failed after a few uses—worth testing the lamp when it arrives, just in case.
Best Product Picks:
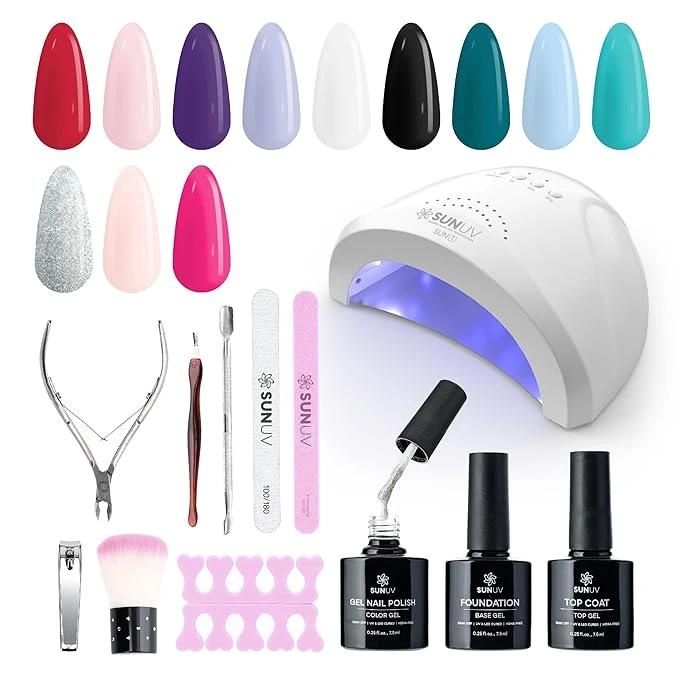
5. SUNUV Salon-Quality Gel Starter Nail Kit for Beginners
This kit is by SUNUV, perfect for beginner-to-intermediate users who want salon tools at their fingertips, especially the electric file. Its approximate price is $60–65.
This kit includes a 48W smart UV/LED lamp, an electric nail drill (e-file) with a bit set. Gel polish (multiple shades), base & no‑wipe top coat, cuticle pushers, nippers, file, buffer, and starter tools, instruction guide for drilling and curing.
Perfect for DIYers ready to level up their nail game! This kit is ideal if you’re exploring poly gel, want to try sculpted nails, or just need a solid all-in-one setup without buying separate tools.
Best Product Picks:
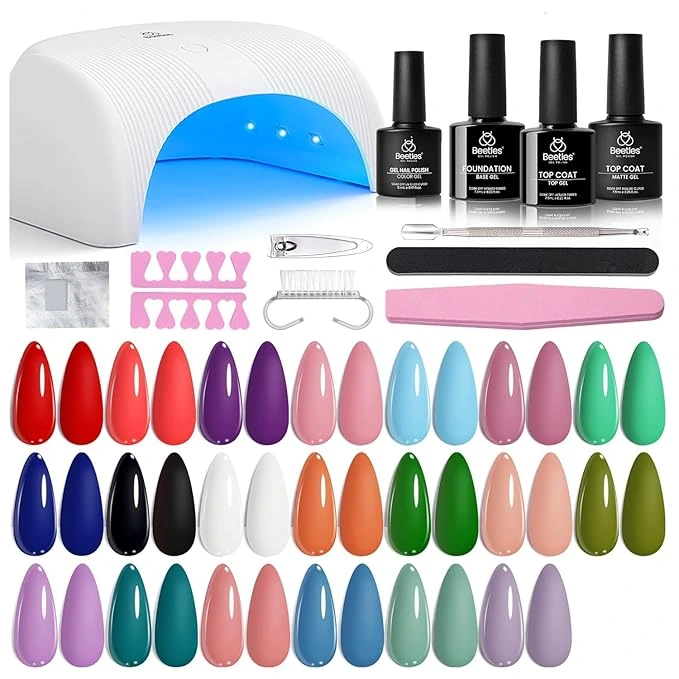
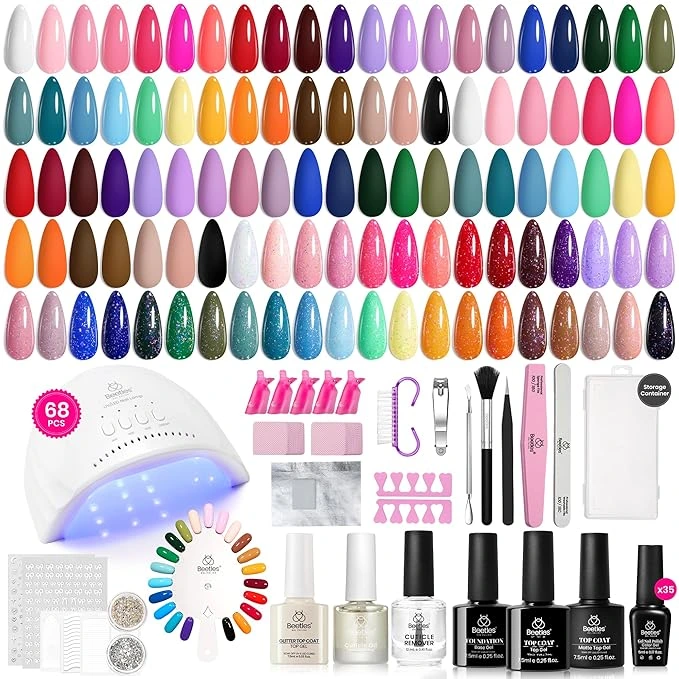
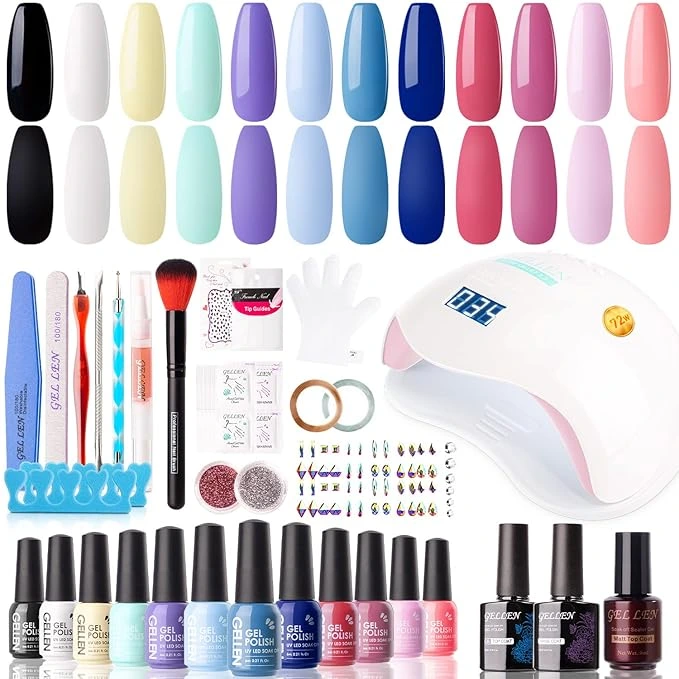
6. Gellen Affordable Gel Starter Nail Kit for Beginners
This kit is by Gellen, perfect if you’re after a colorful, all-in-one home gel kit without splurging. Its approximate price is $30–$45 (depending on the number of colors and lamp wattage)
This kit includes 6 to 12 gel polish shades (jelly or opaque), base & no-wipe top coat, LED/UV lamp (36W, 72W options depending on version), nail file, buffer, cuticle stick, cuticle oil pen, nail art decorations: stickers, rhinestones, glitters, cleansing/remover pads, and instruction guide.
This is best for total newbies, budget queens, and creative DIY nail lovers who wanna try gel polish at home without spending big bucks.
Real-User Feedback:
🫶 “I did 2–3 thin coats and cured each one a little longer — made the mani last way longer.”
😩 “Still had a few nails peeling off after a couple of days… and yes, I prepped properly. Ugh.”
✨ Bonus benefit: Cure each layer longer than usual if you’re using thicker jelly shades for that salon-quality hold.
Best Product Picks:
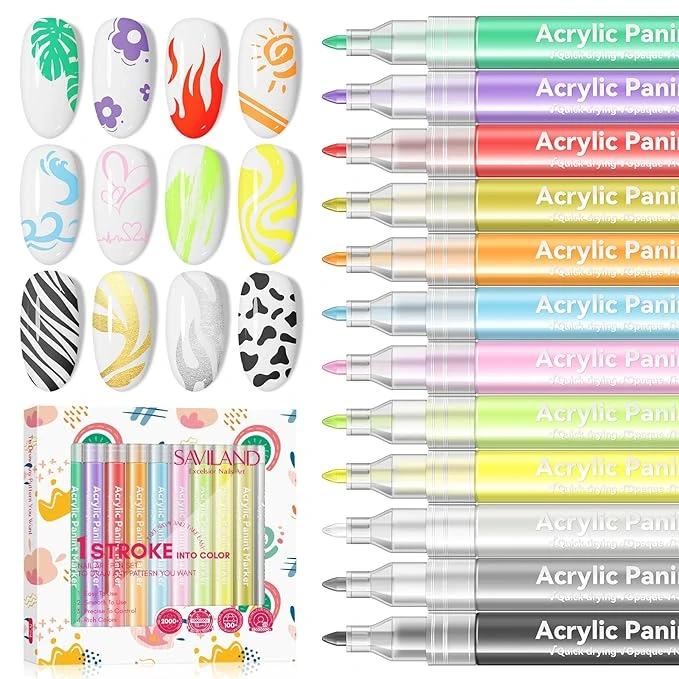
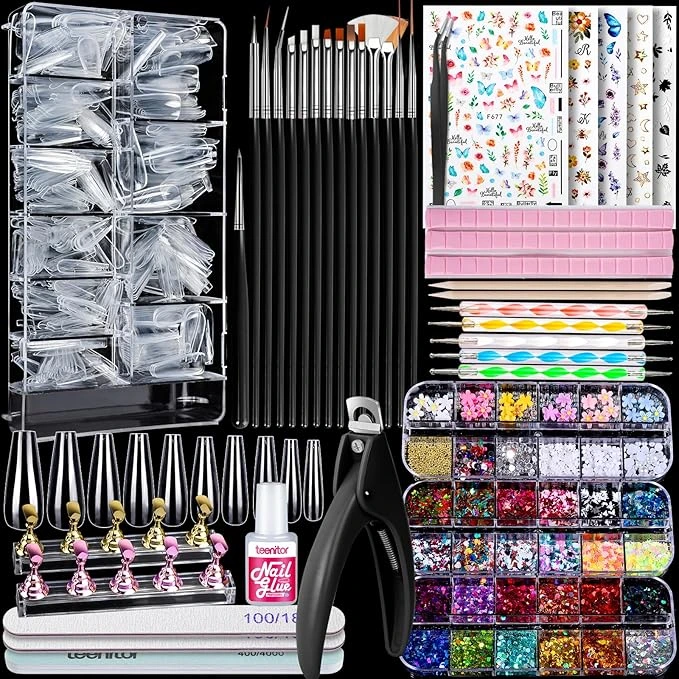
7. Saviland Nail Art Decoration Starter Kit for Beginners
This kit, by Saviland, is ideal for beginners who want to skip gel polish but still create stunning nail art at home. Its price ranges from around $20 to $30 and is packed with creative tools perfect for experimenting with polka dots, floral designs, stripes, marble effects, and more — all without the hassle of UV curing.
The kit includes a wide variety of nail art brushes, dotting pens, glitters, nail foil, striping tape, rhinestones, sequins, nail stickers, metallic studs, and even tweezers, all stored in a convenient box. It’s designed to give you artistic freedom — you can combine these tools with your favorite regular or acrylic polish.
This kit is perfect for beginners, casual nail lovers exploring different styles, teens, DIY crafters, or anyone who prefers regular polish but wants professional-looking results, including trendy art like chrome accents, abstract lines, or vintage florals.
User Feedback:
People love it for the insane variety and say it’s “a great starting point for experimenting with nail looks.” Some mention it’s a bit much for total beginners — but if you’re creative, it’s a goldmine.
Best Product Picks:
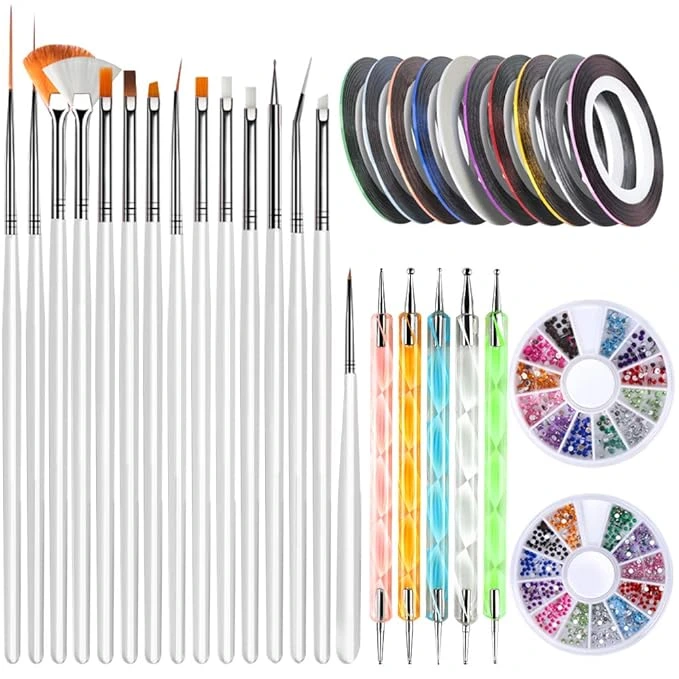
8. Teenitor Basic Starter Nail Art Kit for Beginners
This Teenitor kit is perfect for beginners who don’t want gel polish or UV lamps but still want to experiment with nail art tools like polka dots, striping lines, and florals. It’s affordable, usually under $15–$20, and gives you creative freedom without requiring any electric tools.
This kit includes 5 dual-ended dotting tools, 15 striping brushes in different shapes, tweezers, striping tapes, rhinestones in a wheel, 3D nail decorations, and nail glue. It’s fully packed for detailed nail art play.
This kit is best for DIY nail art lovers who want to draw fine lines, dots, and decorate with gems or floral patterns — without using gel or UV lights. It’s also ideal for teens or anyone just learning basic nail art techniques.
User Feedback
Users love the value for money, especially the dotting tools and brush variety. Many beginners say it’s a “great way to practice designs” without buying full kits.
Best Product Picks:
9. KISS Professional-Style Starter Nail Art Kit for Beginners
If you want salon-style nails without gel polish or a UV lamp, then this KISS Nail Art Kit is perfect because it provides everything you need to start, like striping, dotting, and decorating right at home. It’s designed by the KISS brand, so you’re getting salon-quality at home.
This kit includes paint pots in several shades, nail art brushes, dotting tools, striping tape, gems, foil, glitter, and a top coat. It also has a practice wheel to test your designs before applying them.
This kit is perfect for beginners who want to try a variety of styles — from polka dots and florals to chrome foil and glitter accents. It doesn’t include gel polish or electrically powered tools, making it safe and simple for DIY users.
User Feedback
People love that this kit gives them a “real nail art experience” at home — especially with the foil, striping, and gem accessories. It’s often praised as an easy way to get creative without tech tools.
Best Product Picks:
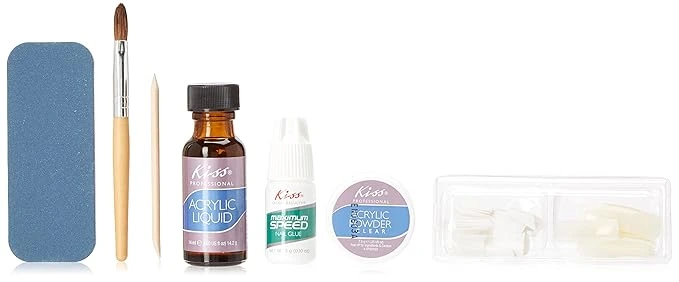
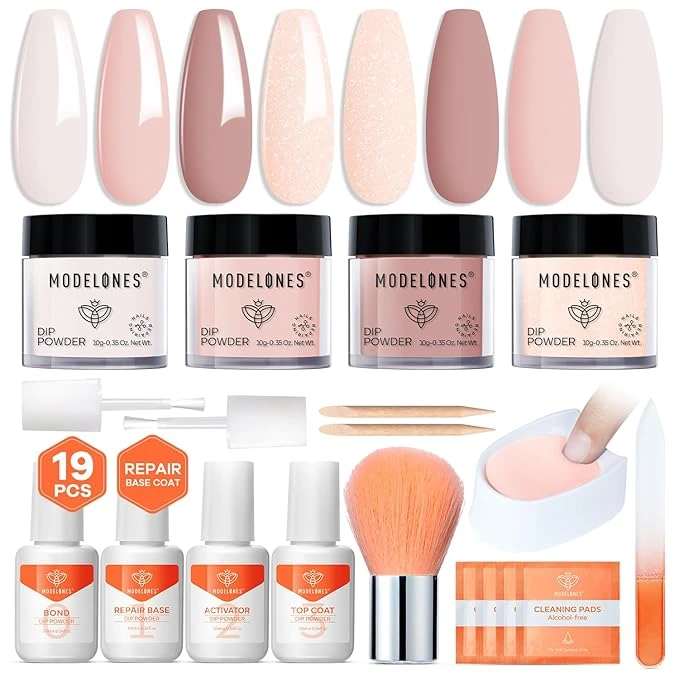
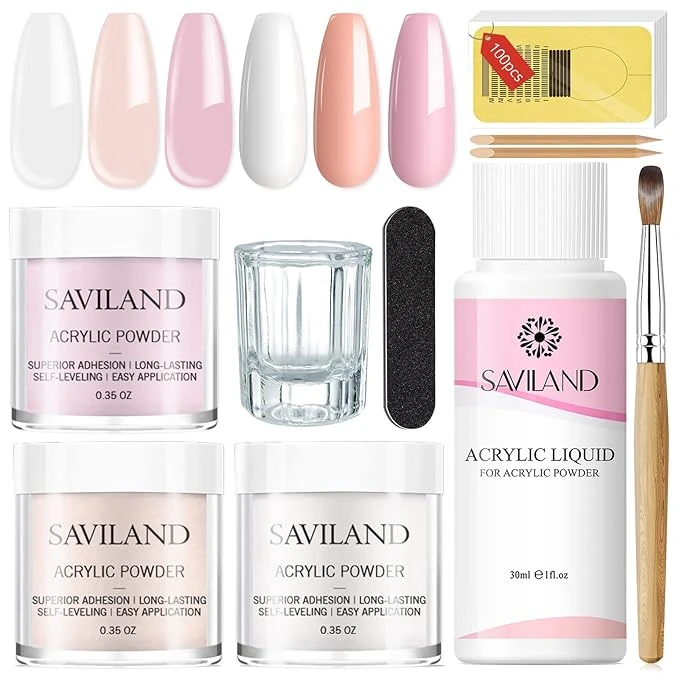
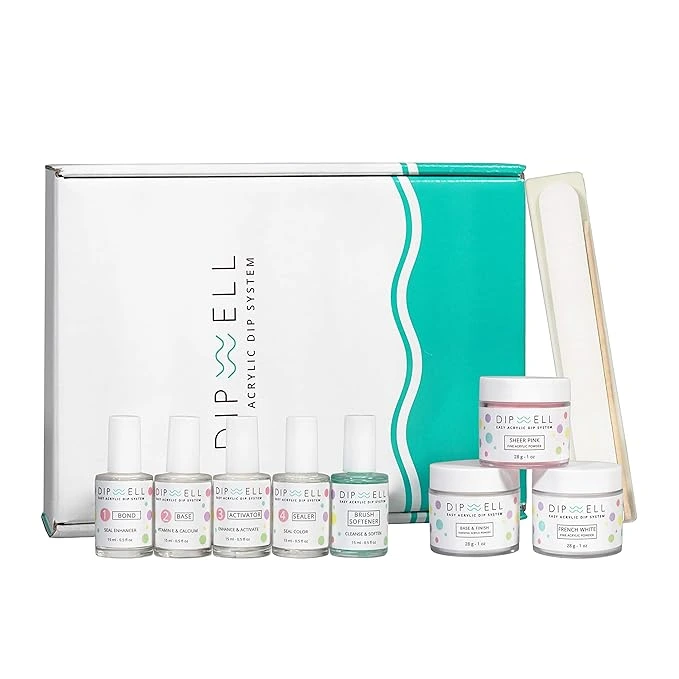
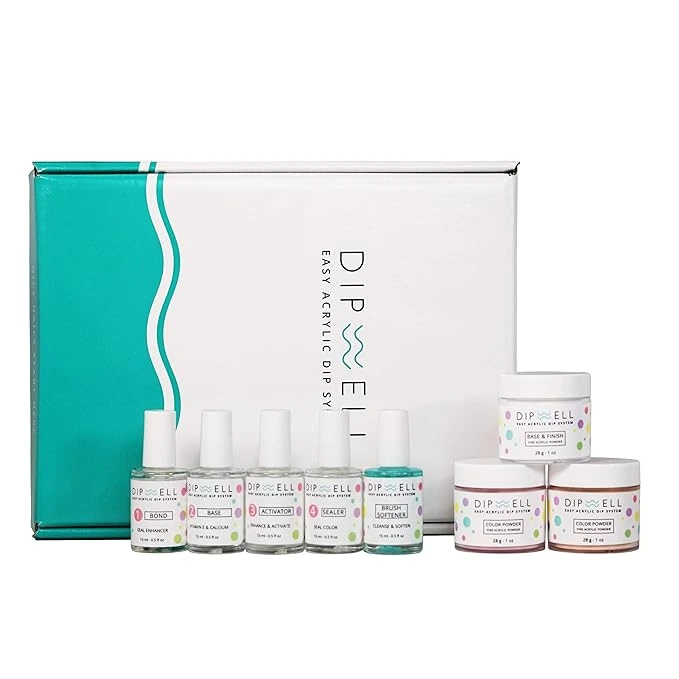
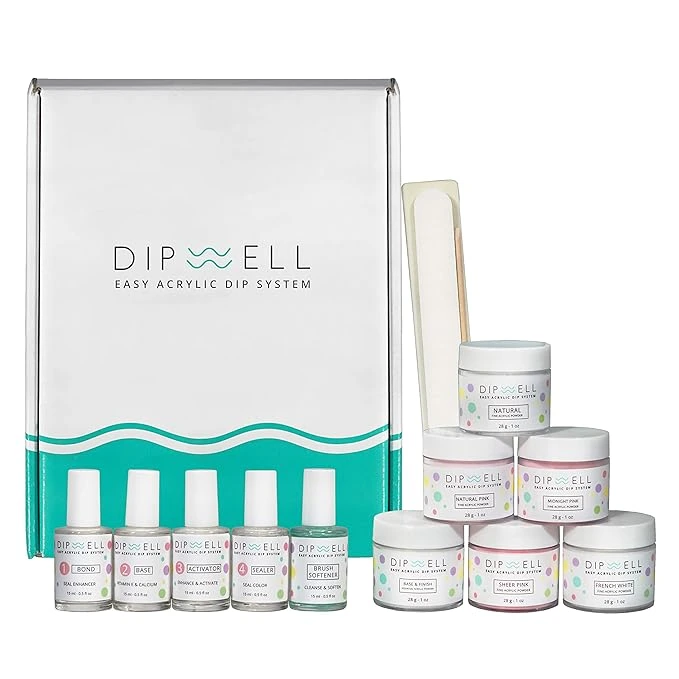
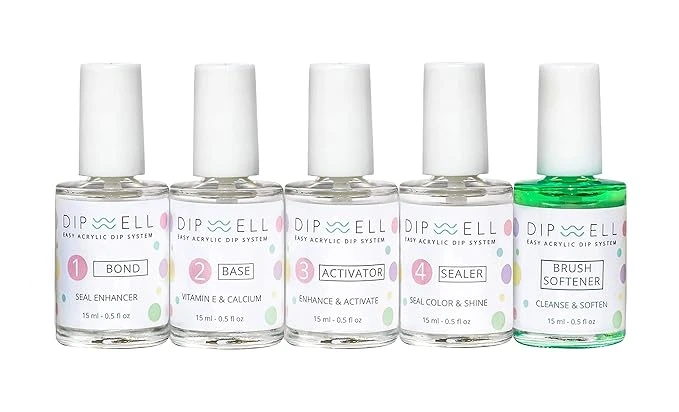
10. Dipwell Acrylic Dip Starter Nail Kit for Beginners
If you’re not ready for gels but want durable, long-lasting nails, then this Dipwell kit is a great option. It’s gel-free, LED-free, and very beginner-friendly for those trying acrylic dip powders at home.
The kit includes 5 essential liquids like bond, base, activator, sealer, and brush softener, plus three beautiful dip powder shades. It also provides clear instructions and tips for flawless application.
Ideal for beginners who want the strength of acrylic without the mess, you don’t need a brush, lamp, or UV setup — just dip and go. It’s especially great for natural nail overlays or subtle nail art layering.
User Feedback
Users love how professional and long-lasting their nails look without going to a salon. It’s often called the best alternative to gel and acrylics for DIY lovers wanting strength with minimal tools.
Best Product Picks:
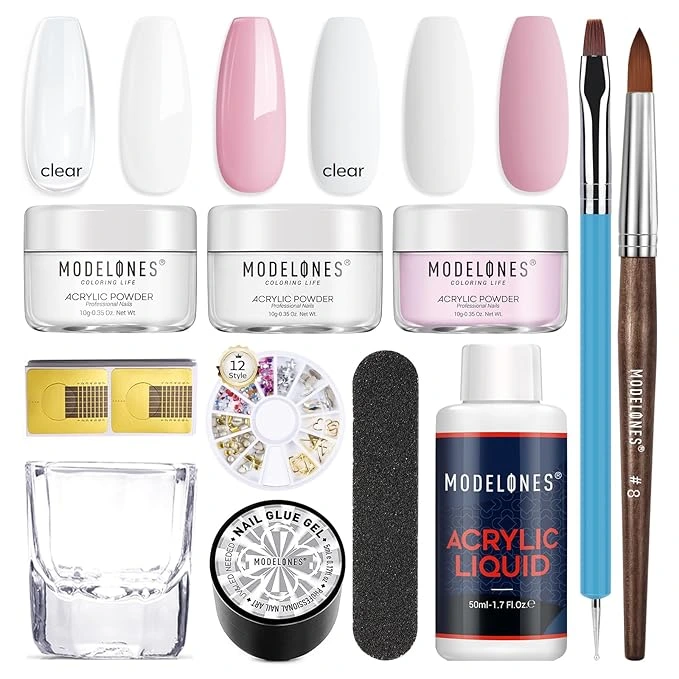
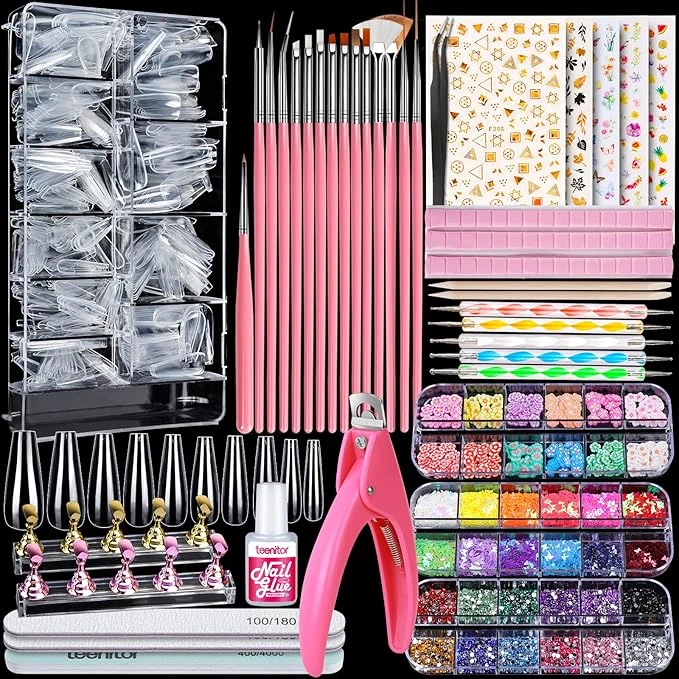
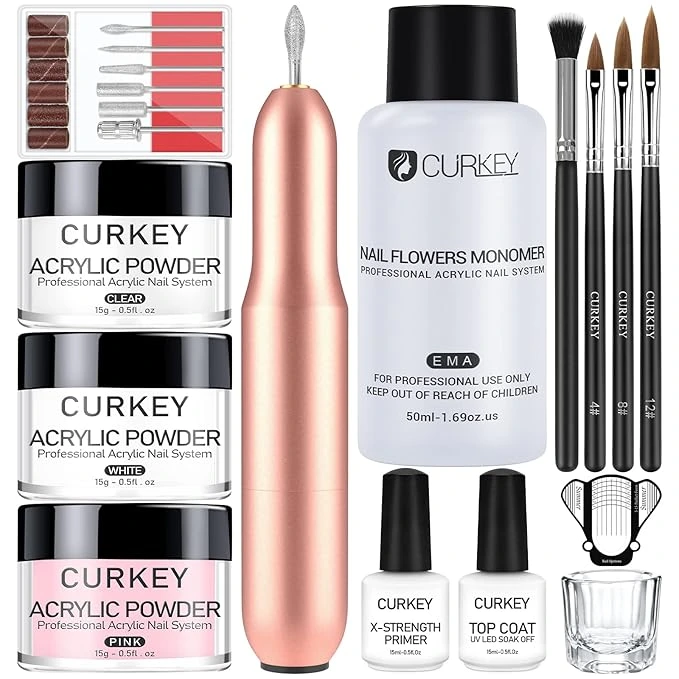
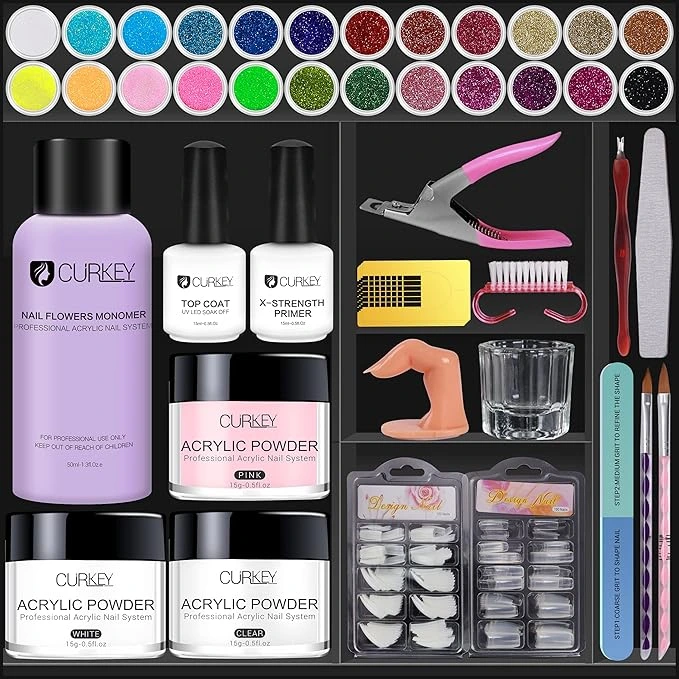
11. Curkey Acrylic & Nail Art Starter Kit for Beginners
Looking for acrylic nails plus a complete nail art setup? The Curkey Acrylic Kit has everything — dotting tools, brushes, striping tape, glitter, and rhinestones — so you can start creating bold looks at home.
This kit includes acrylic liquid, three powders (clear, white, pink), a UV lamp (mainly for sealing top coat), and over 20 nail art tools like brushes, dotters, stickers, and striping tape. It’s designed for creative beginners who want more than simple tips. Even if you don’t use the included gel topcoat or lamp, you’ll still get great value from the acrylic basics and art tools.
User Feedback
Valued for its value and tool quantity. Users say it’s a complete kit perfect for anyone starting with acrylics and DIY nail art.
Best Product Picks:
Quick Comparison For Best Beginner Nail Kits
| Product | Price Range | Best For | Includes Lamp? | Key Features |
|---|---|---|---|---|
| ⭐️ Beetles Gel Nail Kit | $18–$20 | Gel Extensions at Home | Yes | Mini UV lamp, gel tips, glue, adhesive gel |
| ⭐️ Morovan Poly Gel Kit | $30–$40 | Poly Gel Extensions | Yes | LED lamp, poly gel, polish, nail drill, tools |
| Sally Hansen Gel Kit | $40–$45 | One-Shade Gel Nails | Yes | LED lamp, base/top coat, one gel polish, tools |
| Modelones Nail Art Kit | $35–$45 | Creative Nail Art | Yes | Mini UV lamp, polish, dotting tools, gems |
| SUNUV Starter Kit | $60–$65 | Salon-Like Gel Nails | Yes | Smart UV lamp, e-file, polish, full tools |
| Gellen Gel Nail Kit | $30–$45 | Budget Gel Kit | Yes | 6–12 gel shades, lamp, tools, decorations |
| Saviland Decoration Set | $20–$30 | Nail Art (No Gel) | No | Brushes, foils, stickers, rhinestones, tools |
| Teenitor Nail Art Kit | $15–$20 | Basic Nail Art Tools | No | Dotting tools, brushes, rhinestones, glue |
| KISS Nail Art Kit | $20–$30 | Salon-Style Nail Art | No | Paint pots, foil, gems, brushes, practice wheel |
| Dipwell Acrylic Kit | $40–$50 | Acrylic Dip Nails | No | Dip powders, liquids, no lamp needed |
| Curkey Acrylic Kit | $40–$50 | Acrylic + Nail Art | Yes | Acrylic system, lamp, 20+ tools, decorations |
🔍 How to Use a Beginner Nail Kit
I told you about the best starter and beginner-friendly kit, and you decide which kit is best for you and which kit fulfills your needs. After buying the starter kit, your question is how to use it correctly. In this, I will tell you how to use this nail kit step by step because this isn’t some 10-step chemistry experiment. This step-by-step guide will walk you through the basics without the swamp. This guide has just real, beginner-friendly instructions that make sense and leave you with nails you’ll wanna show off. Let’s get into it, one chill step at a time.
✨ Step 1: Nail Prep
- First, wash your hands and pat them dry.
- Trim your nails if they’re too long or uneven.
- Use a nail file to shape (almond, square, oval — your vibe).
- Buff the surface gently to smooth ridges.
- Use a cuticle pusher or orange stick to push back your cuticles (no cutting if you’re a newbie!).
✨ Bonus benefit: This step matters because a well-prepped nail gives you a smoother polish application and longer-lasting results.
🧴 Step 2: Apply Base Coat
- Hold your base coat and apply a thin layer to your nail.
- Don’t use it on your cuticles — keep it slightly away from skin.
- Let it dry (for regular polish) or cure under a lamp (for gel) — usually 30–60 seconds.
✨ Bonus benefit: Thin layers > thick blobs. Less mess, more finesse.
🎨 Step 3: Apply Your Color
- First, choose your favourite nail color and apply a thin, even layer.
- Let it dry or cure, then repeat for a second coat.
- Don’t overload the brush — wipe excess off on the bottle rim.
✨ Bonus benefit: Don’t forget to seal every tip of your nail. It helps your polish last way longer and stops those annoying early chips.
💎 Step 4: Top Coat
Use a top coat to seal your polish and add a glossy or matte finish.
- Apply just like the base coat: thin, smooth, and across the tip edge too.
- Cure (for gel) or air dry (for regular).
✨ 🧠 Reminder: This step isn’t optional. It’s what keeps your polish from chipping on Day 2
🧼 Step 5: Clean & Shine
If you’re using a gel kit, your nails might feel sticky after curing.
- Use an alcohol wipe or the cleanser that came in your kit to gently wipe that layer off.
- Don’t worry — your polish won’t smudge; it’s fully cured.
✨ Bonus benefit: For regular polish? Just let it air dry fully and avoid touching anything for 10–15 mins.
🧁 Step 6: Moisturize & Flex
The last step is to rub a little cuticle oil or hand cream to hydrate your nails and show off your DIY glow.
✨ Bonus benefit: Keep a mini nail rescue kit, which includes a nail filer, remover pen, and cuticle oil, because this kit saves you from smudges, boosts polish life, and makes your nails look professionally done.
💁♀️ Final Pro Tip
Choose a kit based on your goal — basic polish? Go Gellen. Want nail art? Pick Modelones. Into full glam + tools? SUNUV wins.
And hey — mistakes happen. That’s what nail polish remover is for 😉
🎀 Conclusion
Mastering your nails at home isn’t about being perfect — it’s about having the confidence to try, mess up, and glow anyway. ✨ The Best Starter Nail Kits for Beginners aren’t just filled with polish and tools — they’re packed with possibilities. Whether you’re keeping it simple or going full glam, there’s a kit out there that matches your vibe and budget.
Just remember these steps: thin coats, good prep, and a little patience go a long way. So pick your favorite kit from the list above, press play on your chill playlist, and let your hands do the talking. 💅 You got this!
What will you try first? Tag us on Instagram and Facebook with your creations or drop your tips below!
This post contains affiliate links, which means we may earn a small commission (at no extra cost to you) if you decide to purchase through our recommendations. We only share products we truly love and use ourselves.
✨ Ready to glow? Explore the kits above and start your nail journey today!