What is glass skin? And how to get glass skin with 10 proven ways??
Have you ever wondered why some people’s skin literally glows like they have an Instagram filter applied in real life? That’s glass skin—and it’s not genetics, expensive treatments, or luck.
The problem? You’ve probably spent hundreds of dollars on skincare products, followed countless YouTube tutorials, and still wake up to dull, textured skin. You’re stuck in a frustrating cycle of trying new products without seeing real results.
Here’s what top dermatologists say: “Most people fail at getting glass skin because they focus 70% on treatments and only 30% on hydration—when it should be the opposite,” warns Dr. Dennis Gross, Board-Certified Dermatologist.
In this guide, you’ll discover exactly how to get glass skin using scientifically-proven methods that actually work. You’ll learn the exact steps Korean skincare experts use, which products to apply (and in what order), and the biggest mistakes that are sabotaging your results. Whether you’re dealing with acne scars, large pores, or just want that camera-ready glow, this article gives you a clear roadmap to transform your skin in 8-12 weeks.

🔑 Key Takeaways
- Glass skin is a Korean beauty trend that makes your skin look smooth, shiny, and clear like a piece of glass
- You need a multi-step approach : deep cleansing, regular exfoliation, skin flooding (intense hydration), targeted treatments, and healthy lifestyle habits
- The process takes 8-12 weeks of daily effort—there are no overnight miracles or quick fixes
- Hydration is the secret weapon : Use the “7-skin method” and skin flooding home remedies to pump maximum moisture into your skin
- Sun protection is mandatory : Apply SPF 50+ sunscreen every single day to protect and maintain your glass skin results
But here’s the million-dollar question : Are you following these steps in the RIGHT order? Or are you making critical mistakes that are blocking your results no matter how many products you use? Let’s find out what’s really stopping you from getting glass skin.
What is Glass Skin?
Glass skin (called “yuri pibu” in Korean) means your skin looks so smooth, clear, and shiny that it resembles a clean piece of glass. This isn’t about using filters or makeup—it’s about achieving genuinely healthy, glowing skin through proper care.
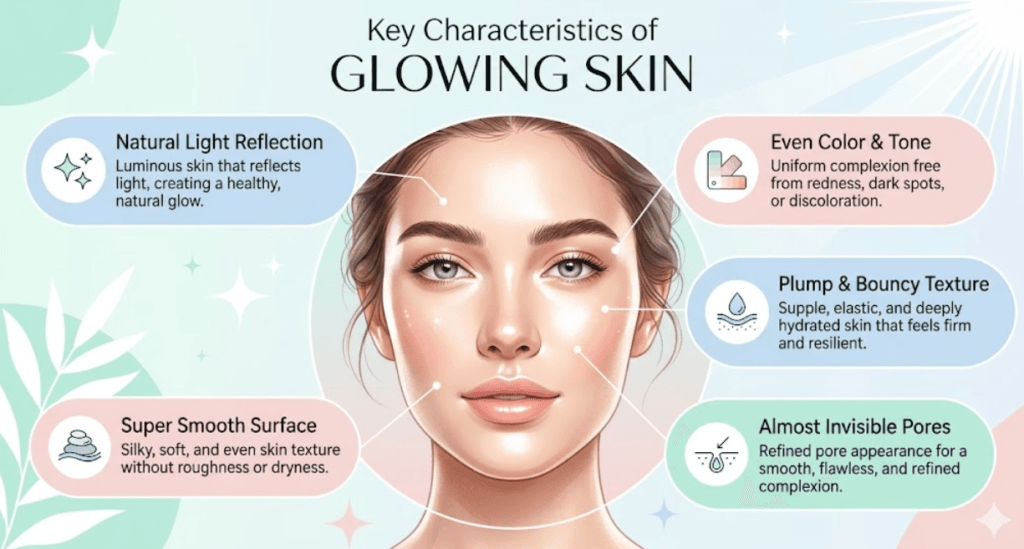
What Glass Skin Actually Looks Like:
- Almost invisible pores : Your pores are so small and clean they’re barely visible
- Natural glow : Your skin reflects light beautifully (not oily, just dewy)
- Even color : No dark spots, redness, or uneven patches
- Bouncy texture : Your skin feels plump and elastic when you touch it
- Super smooth surface : No bumps, dry patches, or rough areas
- See-through quality : Light bounces off your skin evenly, creating a luminous effect
Unlike Western makeup trends that focus on matte, powdery finishes, glass skin celebrates a dewy, hydrated look that appears almost ethereal. It’s not about hiding problems with foundation—it’s about fixing your actual skin health.
The Three Main Goals of Glass Skin:
- Maximum Hydration : Getting multiple layers of water-based products deep into your skin
- Perfect Clarity : Removing all texture, spots, and unevenness
- Natural Shine : Creating that lit-from-within glow through skin health
The Science Behind Achieving Glass Skin
Understanding how to get glass skin is easier when you know what’s happening under your skin’s surface.
How Light Works on Your Skin
Your outer skin layer (called the stratum corneum) controls how light bounces off your face. When this layer has 30-40% water content , the skin cells lie flat and organized. This smooth surface reflects light evenly—creating the “glass” effect.
Dry skin (below 10% water content) has irregular, raised cells that scatter light in all directions, making your skin look dull and tired.
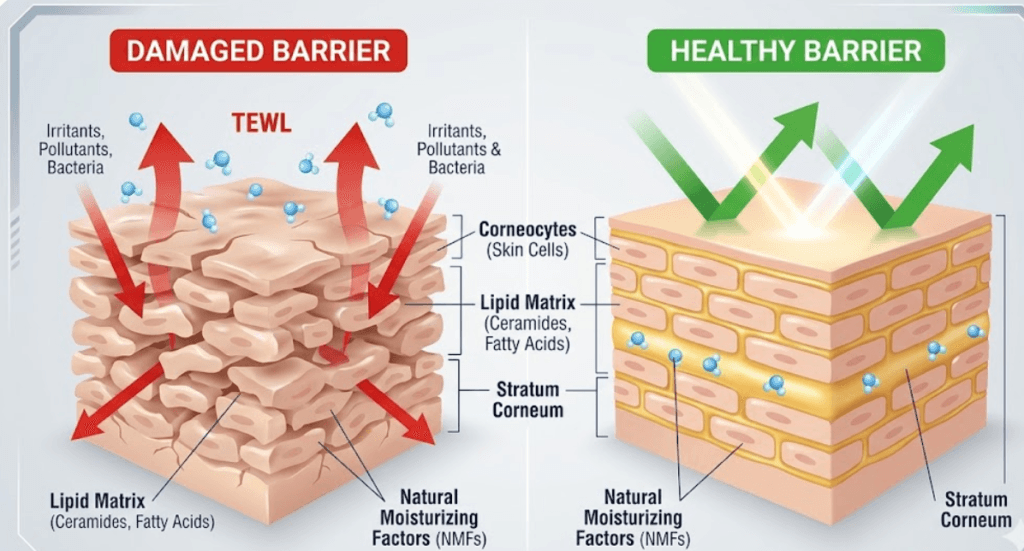
Why Your Skin Barrier Matters
Your skin has a protective barrier made of:
- Ceramides (50%)
- Cholesterol (25%)
- Fatty acids (15%)
This barrier stops water from escaping your skin. When it’s healthy, you get that plump, smooth texture. When it’s damaged, moisture evaporates quickly and your skin looks rough and dehydrated.
Research from the Journal of Clinical and Aesthetic Dermatology (2019) showed that fixing this barrier improved skin smoothness by 42% in just 8 weeks .
What Creates Skin Texture and Spots
- Collagen Loss : After age 25, you lose 1% of your collagen every year, causing sagging and wrinkles
- Uneven Pigmentation : Sun damage and inflammation cause dark spots by triggering excess melanin production
- Dehydration : Lack of moisture makes fine lines more visible and skin texture rough
Glass skin techniques target all three problems using specific ingredients and methods
Expert Insight: “The skin barrier is like a brick wall. Ceramides are the bricks, and lipids are the mortar. When either is damaged, moisture escapes and irritants enter,” explains Dr. Joshua Zeichner, Director of Cosmetic and Clinical Research in Dermatology at Mount Sinai Hospital.
Benefits of Achieving Glass Skin
Getting glass skin isn’t just about looking good—it comes with real health benefits:
Health Benefits for Your Skin
- Stronger Skin Protection : Proper hydration makes your skin barrier 35% more resistant to irritation and pollution
- Slower Aging : Daily sun protection and hydration can reduce wrinkles and age spots by up to 50%
- Better Product Results : When your skin is properly prepared, active ingredients absorb 3x better
Mental and Lifestyle Benefits
- More Confidence : Studies show 78% of people feel more confident after improving their skin
- Less Makeup Needed : Glass skin means you can skip heavy foundation and just use light coverage
- Stress Relief : A consistent skincare routine lowers stress hormones by 17%
Step-by-Step Guide: How to Get Glass Skin
Here are the 10 proven steps that will transform your skin from dull to glowing. Follow them in this exact order for best results.
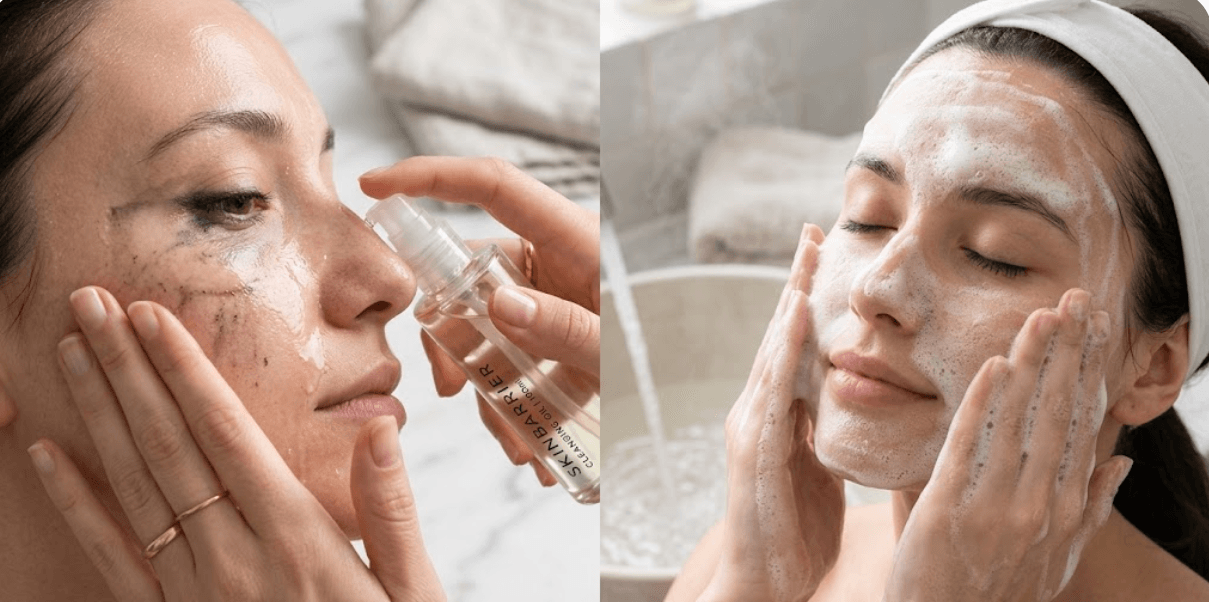
Step 1: Double Cleansing Method
Expert Insight: “Think of double cleansing like washing dishes—you need dish soap for grease AND water to rinse. One cleanser can’t do both jobs effectively,” says Dr. Charlotte Cho, Korean Skincare Expert and Founder of Soko Glam.
Why You Need Two Cleansers
Your face collects two types of dirt:
- Oil-based dirt : Makeup, sunscreen, your skin’s natural oils, pollution
- Water-based dirt : Sweat, bacteria, dust
One cleanser can’t remove both types effectively. That’s why you need two steps.
How to Double Cleanse the Right Way
Oil-Based Cleanser
Water-Based Cleanser
Apply on Dry Skin: Apply the cleansing oil or balm onto completely dry skin with dry hands. | pH-Balanced Choice: Always use a gentle cleanser with a pH level between 5.0 and 6.5. |
Gentle Massage: Massage gently in circular motions for 60-90 seconds. | Create Foam: Create a light foam with a little water and massage for 30-60 seconds. |
Target Zones: Focus on areas with makeup (eyes, lips) and oily zones (nose, forehead). | Thorough Rinse: Rinse thoroughly so that no residue remains on the skin. |
Emulsify: Add a little water to turn the oil milky (this process is called emulsifying). | Pat Dry: Gently pat your face dry with a clean towel; do not rub. |
Lukewarm Rinse: Rinse with lukewarm water (avoid using hot water). | Result: Skin will be perfectly clean and fresh without feeling dry or tight. |
Best Products for Double Cleansing
Skin Type
Oil-Based Cleanser
Water-Based Cleanser
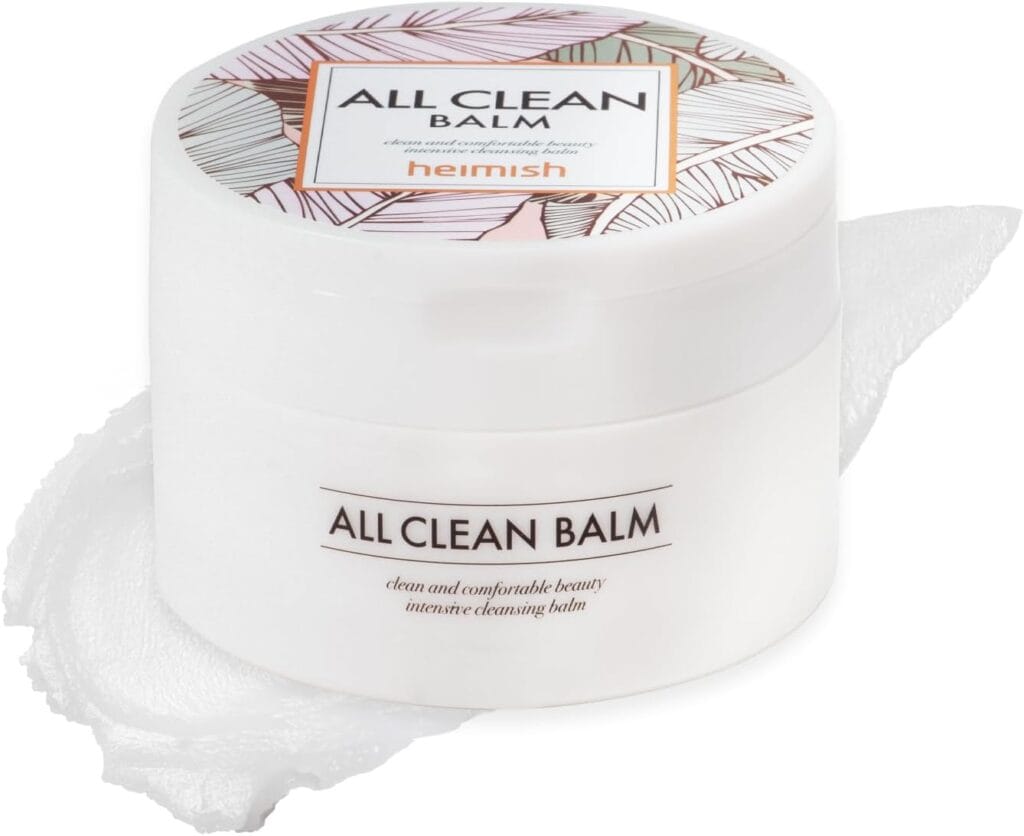
Oily | Heimish All Clean Balm | COSRX Low pH Good Morning Cleanser |
Dry | DHC Deep Cleansing Oil | CeraVe Hydrating Facial Cleanser |
Combination | Banila Co Clean It Zero | La Roche-Posay Toleriane Cleanser |
Sensitive | Simple Hydrating Cleansing Oil | Vanicream Gentle Facial Cleanser |
Acne-Prone | Kose Softymo Speedy Cleansing Oil | CeraVe Foaming Facial Cleanser |
Pro Tip : Double cleanse only at night. In the morning, just use the water-based cleanser since you don’t have makeup or sunscreen to remove.
Step 2: Exfoliation Strategy
Exfoliation removes dead skin cells that make your face look dull and rough. For glass skin, you need chemical exfoliants , not harsh scrubs.
Expert Insight: “Physical scrubs are like using sandpaper on silk—they create micro-tears that damage your skin barrier. Chemical exfoliants gently dissolve dead cells without scratching,” warns Dr. Dennis Gross, Board-Certified Dermatologist.
Chemical Exfoliants vs. Physical Scrubs
- Physical Scrubs (sugar, salt, beads): Can create micro-tears and damage skin—avoid these
- Chemical Exfoliants (acids): Gently dissolve dead cells without scratching—use these instead
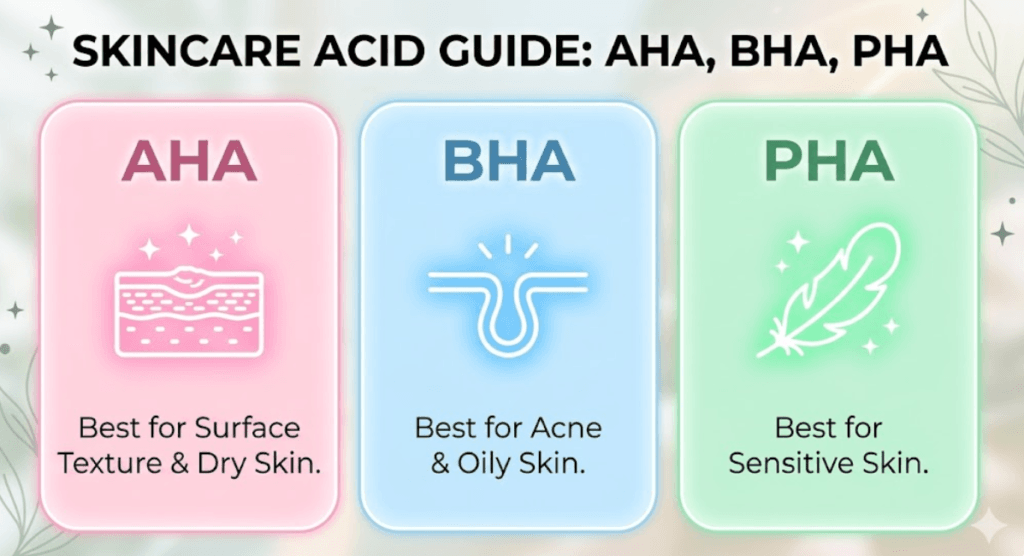
Types of Chemical Exfoliants
AHAs (Alpha Hydroxy Acids) – Work on the surface:
- Glycolic Acid : Smallest molecule, penetrates deep, best for aging concerns
- Lactic Acid : Gentle, hydrating, good for dry or sensitive skin
- Mandelic Acid : Largest molecule, very gentle, perfect for sensitive skin
BHAs (Beta Hydroxy Acids) – Work inside pores: - Salicylic Acid : Dissolves oil inside pores, best for oily and acne-prone skin
PHAs (Polyhydroxy Acids) – Ultra-gentle: - Gluconolactone : Hydrating and exfoliating, perfect for very sensitive skin
How Often Should You Exfoliate?
How to Exfoliate Properly
- Apply after cleansing on completely dry skin 2. Wait 15-20 minutes before applying other products (this gives acids time to work)
- Start with 2x per week, then increase gradually
- Always use sunscreen the next morning (acids make skin sun-sensitive)
- If you feel stinging or redness, reduce frequency
Best Exfoliating Products :
Skin Type
Frequency
Best Acids to Use
Recommended Products
How to Use
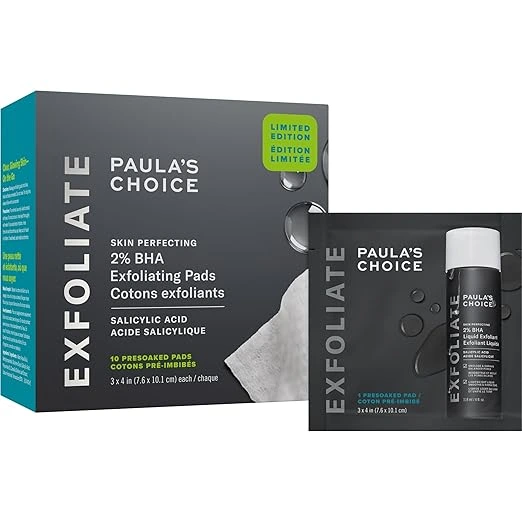
Oily | 3-4x per week | 2% Salicylic acid OR 7% Glycolic acid | Paula’s Choice 2% BHA Liquid Exfoliant | Alternate these acids on different nights. (Note: PC BHA can be used daily if tolerated). |
Combination | 2-3x per week | 5% Lactic acid OR 1% Salicylic acid | The Ordinary AHA 30% + BHA 2% Peeling Solution | Use one type per session. Use the Peeling Solution max 1-2x per week for only 10 mins. |
Normal | 2-3x per week | 5-8% Glycolic acid OR Lactic acid | COSRX AHA 7 Whitehead Power Liquid | Choose one and stick with it. COSRX is great for texture and whiteheads. |
Dry | 2x per week | 5% Lactic acid OR 10% PHA | COSRX AHA 7 Whitehead Power Liquid | Apply to damp skin for gentleness (though AHAs are usually best on dry skin to prevent irritation). |
Sensitive | 1-2x per week | 8% PHA OR 5% Mandelic acid | The Inkey List PHA Toner | Start once weekly. This toner is gentle enough for daily use once your skin adjusts. |
Important : The “OR” means alternate between products on different nights—NEVER mix acids in one session unless a dermatologist formulated the product that way.
Step 3: Hydration Layering Technique
This is the most important step for glass skin. The Korean “7-skin method” and “skin flooding” involve applying multiple layers of watery products so your skin absorbs maximum moisture.
Expert Insight: “The 3-second rule is crucial: Apply your next product within 3 seconds of the previous one while skin is still damp. This seals in moisture between layers and maximizes absorption,” advises Dr. Charlotte Cho, Korean Skincare Expert.
Why Layering Works
Each thin layer adds 2-5% more water to your skin. When you apply 3-7 layers, you reach 30-40% hydration —the perfect level for dewy, plump, glass-like skin.
Essential Hydrating Ingredients
Ingredient Type
What It Does
Best Ingredients
Concentration
Benefits
Humectants (Pull water into skin) | Attract and hold moisture like a magnet | Hyaluronic Acid, Glycerin, Sodium PCA, Beta-Glucan, Panthenol (B5) | HA: 0.5-2%, Glycerin: 5-10%, Panthenol: 2-5% | Plumps skin, reduces fine lines |
Emollients (Soften and smooth) | Fill gaps between skin cells, create smoothness | Squalane, Ceramides, Niacinamide | Squalane: 100% oil, Ceramides: 1-5%, Niacinamide: 4-5% | Smooths texture, strengthens barrier |
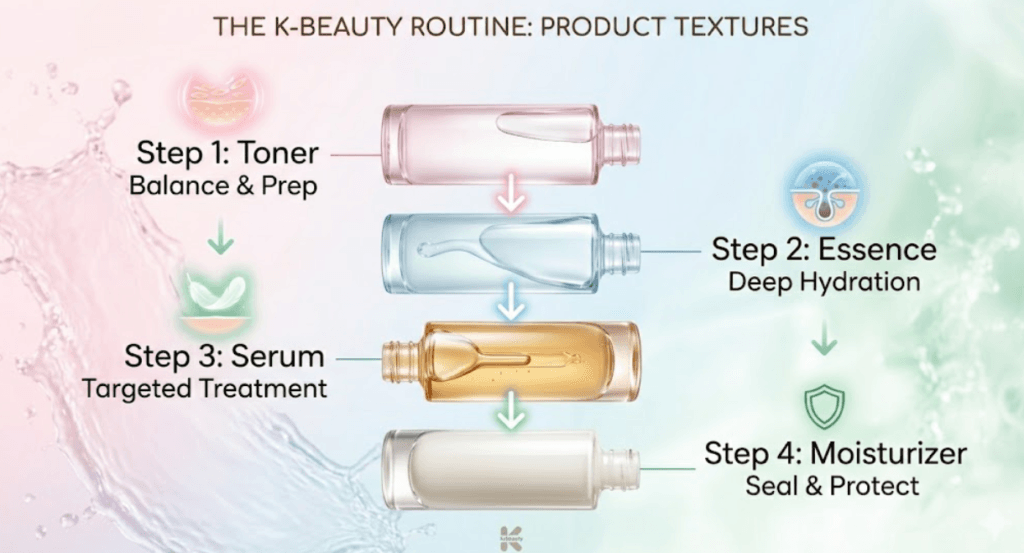
The Perfect Hydration Order (Thinnest to Thickest)
Product
When to Apply
How to Apply
Wait Time
Best Products
Toner/Essence | Right after cleansing on damp skin | Pour into palms, pat gently on face | 30 sec between each layer | COSRX Snail Mucin Essence, Klairs Supple Preparation Toner, SK-II Facial Treatment Essence |
Hydrating Serum | After toner layers absorbed | 3-4 drops, pat gently | 1 minute | The Ordinary Hyaluronic Acid 2% + B5, Vichy Mineral 89 |
Treatment Serum | After hydrating serum | 3-4 drops, pat gently | 1-2 minutes | The Ordinary Niacinamide 10% + Zinc, Timeless Vitamin C Serum |
Ampoule/Booster | After serums | 2-3 drops | 1 minute | Missha Time Revolution Night Repair Ampoule |
Sheet Mask | After exfoliation or as boost | 15-20 minutes MAX | Remove after 20 min |
The 7-Skin Method: Exact Steps
- Pour hydrating toner into your palms
- Pat gently onto your entire face and neck
- Wait 15-30 seconds for it to sink in
- Repeat 6 more times (total of 7 layers)
- Your skin should look dewy but not dripping wet
Time needed : 3-5 minutes Results : You’ll see plumper skin within 3-5 days
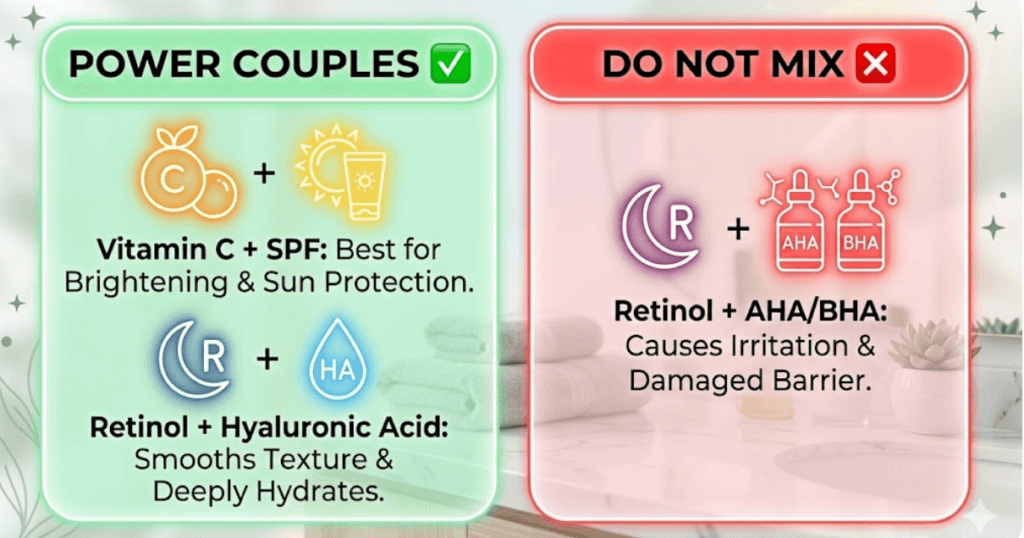
⚠️ Important Layering Rules
Category
Ingredient Combination
When to Use Them
NEVER MIX | Vitamin C + Niacinamide | Vit C in AM, Niacinamide in PM |
NEVER MIX | Retinol + AHA/BHA Acids | use in alternate night |
NEVER MIX | Benzoyl Peroxide + Retinol | BP in AM, Retinol in PM |
ALWAYS COMPATIBLE | Hyaluronic Acid + Niacinamide | Anytime |
ALWAYS COMPATIBLE | Vitamin C + Hyaluronic Acid | In AM routine |
ALWAYS COMPATIBLE | Retinol + Hyaluronic Acid | In PM routine |
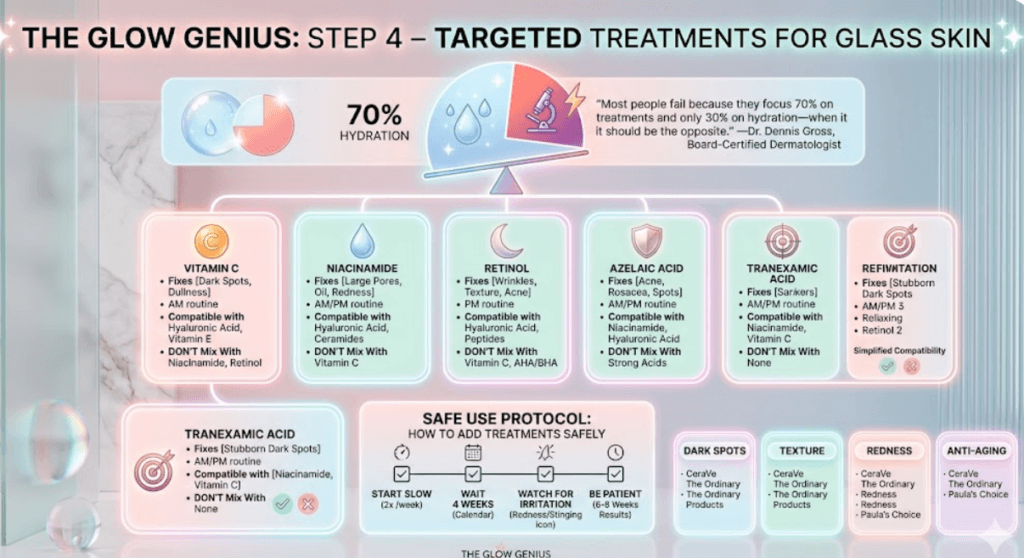
Step 4: Targeted Treatments
After hydration, you need specific ingredients to fix skin problems like dark spots, texture, or fine lines.
Expert Insight: “For glass skin, focus 70% on hydration, 30% on treatments. Most people do the opposite and wonder why their skin looks dry despite using expensive serums,“ emphasizes Dr. Dennis Gross, Board-Certified Dermatologist.
How to Add Treatments Safely
- Start with ONE new ingredient and use it for 4 weeks before adding another
- Begin slowly : Use 2x per week, then increase to daily if tolerated
- Watch for irritation : Redness, stinging, or peeling means you’re using too much
- Be patient : Results take 6-8 weeks minimum
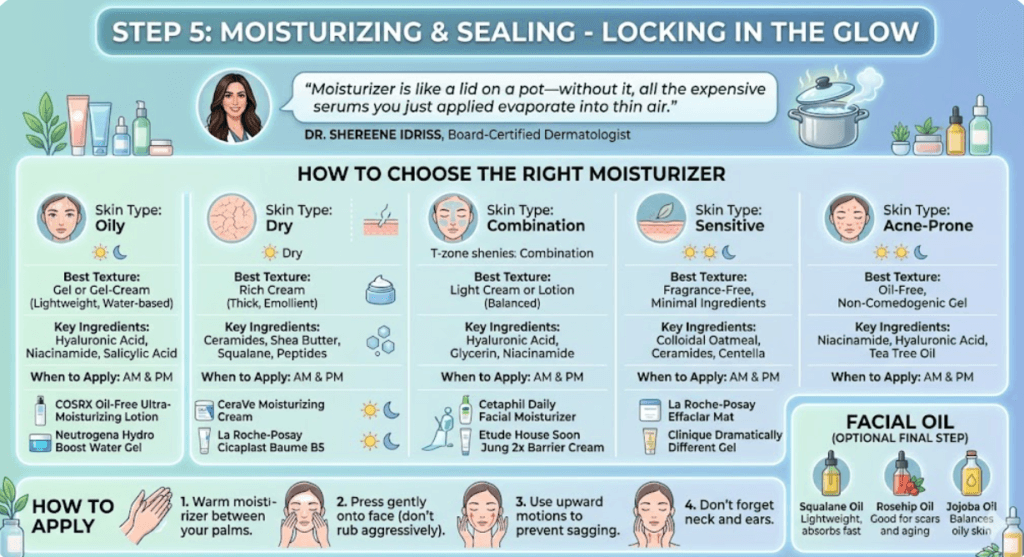
Step 5: Moisturizing and Sealing
Even oily skin needs moisturizer to lock in all the hydration and treatments you just applied.
Expert Insight: “Moisturizer is like a lid on a pot—without it, all the expensive serums you just applied evaporate into thin air,” explains Dr. Shereene Idriss, Board-Certified Dermatologist.
How to Choose the Right Moisturizer
Skin Type
Products + Ingredient
Recommended Products
Oily | Gel or gel-cream (lightweight, water-based, Hyaluronic acid, Niacinamide, Salicylic acid) | COSRX Oil-Free Ultra-Moisturizing Lotion, Neutrogena Hydro Boost Water Gel |
Dry | Rich cream (thick, emollient, Ceramides, Shea butter, Squalane, Peptides) | CeraVe Moisturizing Cream, La Roche-Posay Cicaplast Baume B5 |
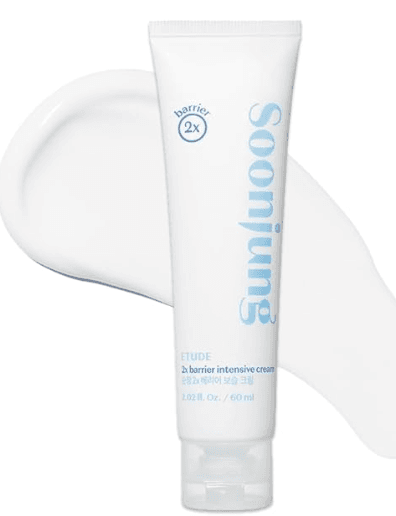
Combination | Light cream or lotion (Hyaluronic acid, Glycerin, Niacinamide) | Cetaphil Daily Facial Moisturizer, Etude House Soon Jung 2x Barrier Cream |
Sensitive | Fragrance-free, minimal ingredients(Colloidal oatmeal, Ceramides, Centella) | Vanicream Moisturizing Cream, Aveeno Eczema Therapy Daily Cream |
Acne-Prone | Oil-free, non-comedogenic gel(Niacinamide, Hyaluronic acid, Tea tree oil) | La Roche-Posay Effaclar Mat, Clinique Dramatically Different Gel |
Facial Oil (Optional Final Step)
Apply 2-3 drops of facial oil as the very last step to seal everything in:
- Squalane Oil : Lightweight, absorbs fast
- Rosehip Oil : Good for scars and aging
- Jojoba Oil : Balances oily skin
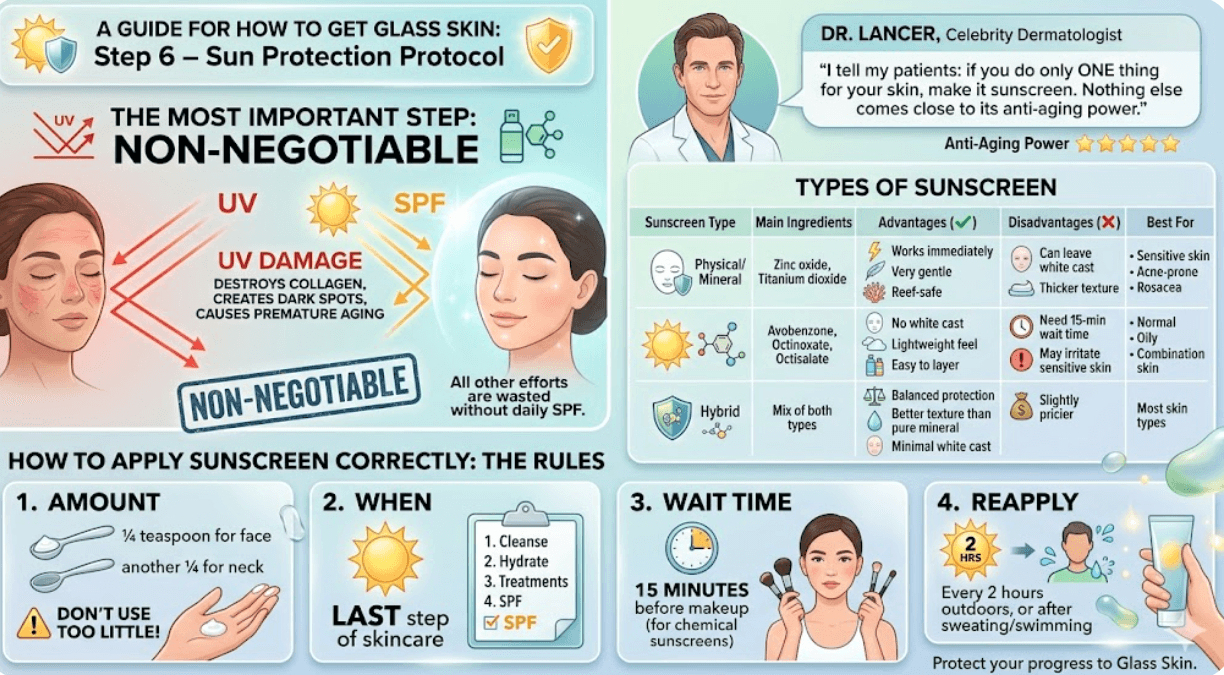
Step 6: Sun Protection Protocol
This is the MOST IMPORTANT step. Without daily sunscreen, all your other efforts are wasted because UV damage destroys collagen, creates dark spots, and causes premature aging.
Expert Insight: “I tell my patients: if you do only ONE thing for your skin, make it sunscreen. Nothing else comes close to its anti-aging power,” states Dr. Lancer, Celebrity Dermatologist.
Types of Sunscreen
Sunscreen Type
Main Ingredients
Best For
Physical/Mineral | Zinc oxide, Titanium dioxide | Sensitive skin, Acne-prone, Rosacea |
Chemical/Organic | Avobenzone, Octinoxate, Octisalate | Normal, Oily, Combination skin |
Hybrid | Mix of both types | Most skin types |
How to Apply Sunscreen Correctly
- Amount : Use ¼ teaspoon for face, another ¼ for neck (most people use too little!)
- When : Every morning as the LAST step of skincare
- Wait time : 15 minutes before makeup (for chemical sunscreens)
- Reapply : Every 2 hours if outdoors, or after sweating/swimming
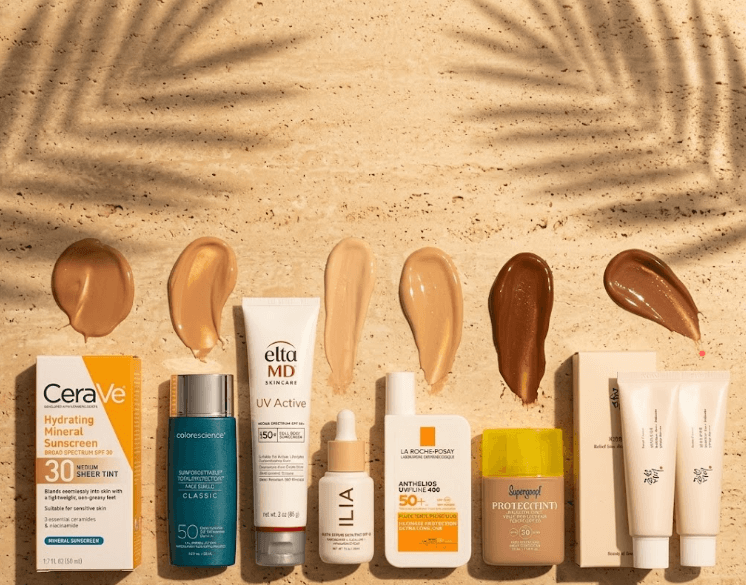
Best Sunscreens for Glass Skin
Product
Type + Finish
Best For
Chemical(Dewy, glowy) | All skin types | |
Mineral(Matte) | Sensitive, acne-prone | |
Chemical(Invisible, velvety) | Oily, makeup base | |
Hybrid(Natural) | Acne, rosacea | |
Chemical(Hydrating, dewy) | Dry skin | |
Chemical(Lightweight gel) | Oily skin |
Step 7: Facial Massage and Tools
Facial massage improves blood circulation, reduces puffiness, and helps products absorb better—all contributing to that glass skin glow.
Expert Insight: “Facial massage isn’t just relaxing—it stimulates lymphatic drainage, which reduces puffiness and gives skin that sculpted, defined look,” notes Dr. Nigma Talib, Naturopathic Doctor and Skincare Expert.
Manual Facial Massage (5 minutes daily)
- Forehead : Sweep fingers from center outward toward temples (10 times)
- Cheeks : Start at nose, sweep across cheekbones toward ears (10 times)
- Jawline : Use knuckles to glide from chin to ears (10 times)
- Under Eyes : Gently tap with ring finger from inner to outer corner (10 times)
- Neck : Sweep upward from collarbone to chin (10 times).
Always massage UPWARD and OUTWARD to fight gravity and prevent sagging.
Massage with tool
- Always apply facial oil or serum first (never use on dry skin)
- Use gentle pressure (tools should glide, not drag)
- Clean tools after each use with soap and water
- Store in a clean, dry place

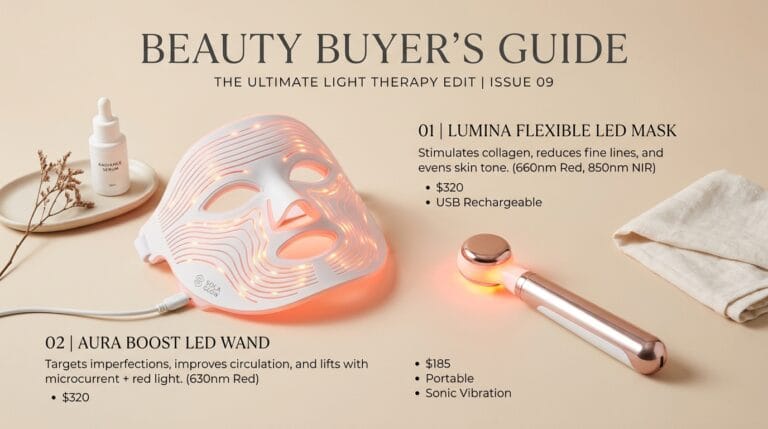
Best Facial Tools
Tool
What It Does
Best Time to Use
Reduces puffiness, cools skin | Morning after applying serum | |
Sculpts face, drains lymph | Evening with facial oil | |
Shrinks pores, reduces inflammation | Morning before skincare | |
Deep cleansing, gentle exfoliation | During cleansing step |
Step 8: How to Get Glass Skin with Diet and Lifestyle
What you eat and how you live affects your skin just as much as what you put ON your skin.
Expert Insight: “You can’t out-cream a bad diet. Sugar causes glycation, which damages collagen and elastin—the very proteins that give you glass skin,“ warns Dr. Whitney Bowe, Board-Certified Dermatologist and Author.
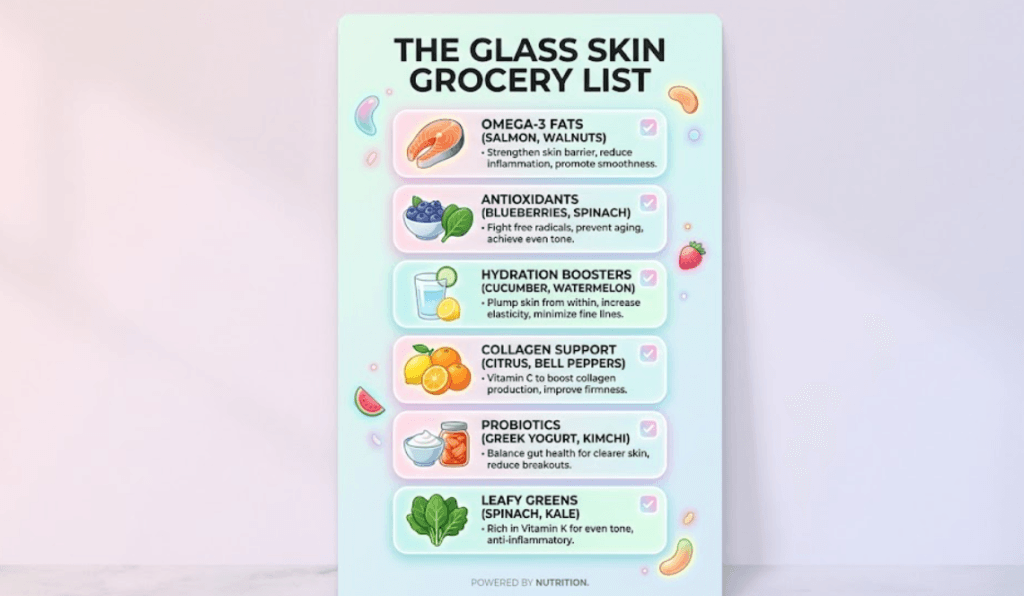
Best Foods for Glass Skin
Food Category
Specific Foods
How It Helps Your Skin
Water-Rich Foods | Cucumber, Watermelon, Oranges, Strawberries, Celery | Hydrates from within, plumps skin |
Omega-3 Fatty Acids | Salmon, Sardines, Walnuts, Flaxseeds, Chia seeds | Reduces redness, strengthens barrier |
Antioxidants | Blueberries, Green tea, Dark chocolate (70%+), Spinach | Fights free radicals, prevents aging |
Collagen-Boosting | Bone broth, Citrus fruits, Leafy greens, Bell peppers | Supports collagen production |
Probiotics | Greek yogurt, Kimchi, Sauerkraut, Kefir, Miso | Improves gut health = clearer skin |
Foods to Avoid
- Sugar : Causes glycation (damages collagen), triggers breakouts
- Dairy : May worsen acne in some people
- Processed foods : High in inflammatory ingredients
- Alcohol : Dehydrates skin, dilates blood vessels
Daily Hydration
- Drink 8-10 glasses (64-80 oz) of water daily
- Add lemon or cucumber for flavor and extra vitamins
- Limit caffeine (it dehydrates skin)
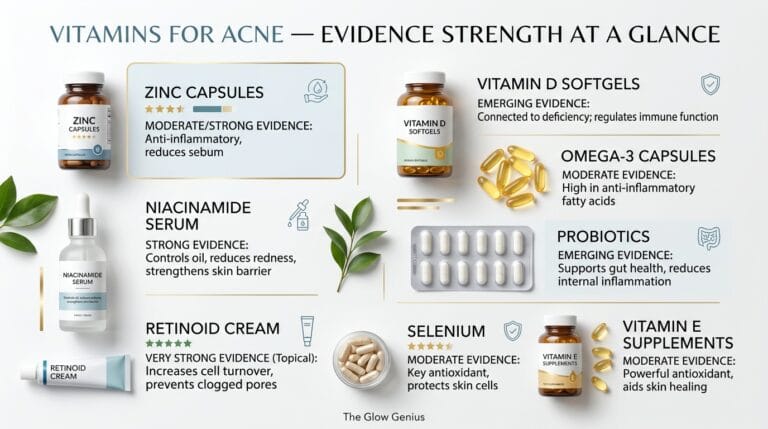
Supplements for Glass Skin
- Vitamin C : 500-1000mg daily (boosts collagen)
- Omega-3 : 1000mg daily (reduces inflammation)
- Probiotics : 10 billion CFU (improves skin barrier)
- Collagen Peptides : 5-10g daily (improves skin elasticity)
Consult a doctor before starting any supplements.
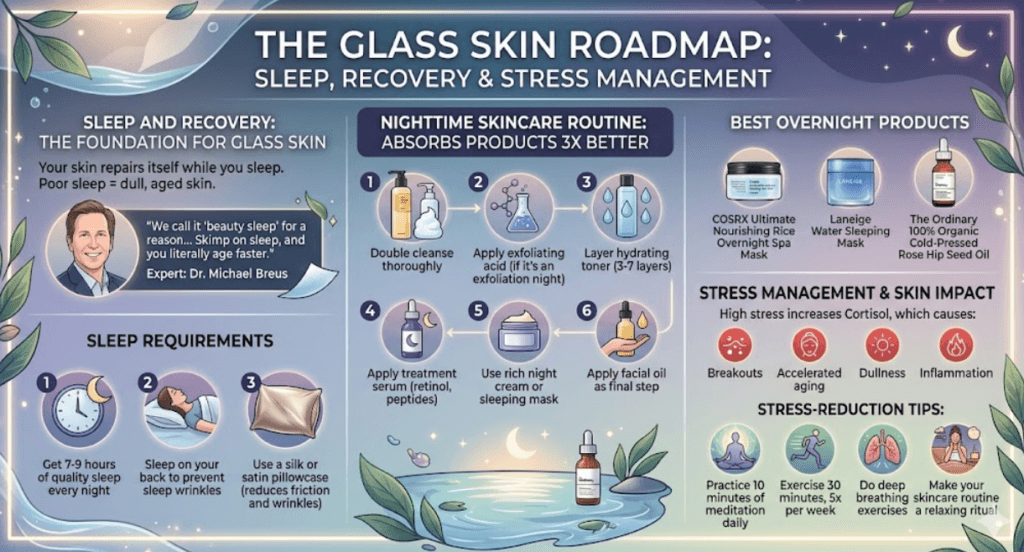
Step 9: Sleep and Recovery
Your skin repairs itself while you sleep. Poor sleep = dull, aged skin.
Expert Insight: “We call it ‘beauty sleep’ for a reason. During deep sleep, growth hormone peaks and repairs damaged DNA and collagen. Skimp on sleep, and you literally age faster,” explains Dr. Michael Breus, Clinical Psychologist and Sleep Specialist.
Sleep Requirements
- Get 7-9 hours of quality sleep every night
- Sleep on your back to prevent sleep wrinkles
- Use a silk or satin pillowcase (reduces friction and wrinkles)
Stress Management
High stress increases cortisol, which causes:
- Breakouts
- Accelerated aging
- Dullness
- Inflammation
Stress-Reduction Tips :
- Practice 10 minutes of meditation daily
- Exercise 30 minutes, 5x per week
- Do deep breathing exercises
- Make your skincare routine a relaxing ritual
Step 10: Consistency and Patience
The biggest secret to glass skin isn’t a magic product—it’s consistency. you will Track Progress by:
- Take photos every 2 weeks (same lighting, no makeup)
- Keep a skincare journal noting what you use and how skin feels
- Measure improvements objectively, not just by feeling
Realistic Timeline
- Week 1-2 : Skin feels more hydrated and plump
- Week 3-4 : Texture starts improving, less dryness
- Week 6-8 : Noticeable glow and smoothness appear
- Week 10-12 : Significant improvement in clarity and tone
- 3-6 months : Full glass skin transformation
Daily Routine Structure
Step
Morning Routine
Night Routine
Step 1 | Water-based Cleanser | Oil Cleanser (Double Cleanse) |
Step 2 | Hydrating Toner (3 layers) | Water-based Cleanser |
Step 3 | Vitamin C Serum | Exfoliating Acid (2-3x per week) |
Step 4 | Moisturizer | Hydrating Toner (7 layers technique) |
Step 5 | Sunscreen SPF 50+ | Treatment Serum (Retinol/Niacinamide) |
Step 6 | — | Eye Cream |
Step 7 | — | Night Moisturizer |
Step 8 | — | Facial Oil (Optional for extra glow) |
Editor’s Picks

Common Mistakes to Avoid
The Mistake
The Solution
Over-Exfoliating: Using acids every day or mixing too many strong acids. | Stick to 2-3x per week max. Use only ONE acid per session. Watch for redness or burning. |
Skipping Sunscreen: Thinking you don’t need it because you are indoors. | Apply SPF 50+ every morning. Windows don’t block UVA rays that cause aging. |
Using Too Many Actives: Layering Vitamin C, Retinol, and acids all at once. | Divide your routine. Vitamin C in AM, Retinol in PM, and acids on alternate nights. |
Not Patch Testing: Applying new products all over your face immediately. | Test on inner arm or behind ear for 24-48 hours first to prevent allergic reactions. |
Expecting Overnight Results: Giving up after only 2 weeks. | Commit to 3 months. Real skin transformation takes 8-12 weeks minimum. |
Dirty Brushes & Pillowcases: Washing brushes and pillowcases too rarely. | Wash brushes weekly and change pillowcases every 2-3 days to reduce bacteria. |
Hot Water & Harsh Towels: Hot showers and rubbing the face dry. | Use lukewarm water and gently pat your face dry. Rubbing causes irritation. |
Ignoring Neck and Hands: Only applying products to your face. | Extend your routine. Apply all products to your neck, chest, and the backs of your hands. |
FAQ Section
Conclusion
Achieving glass skin is entirely possible, but it requires shifting your mindset from “quick fixes” to “long-term skin health.” By prioritizing a strong skin barrier, mastering the art of the double cleanse, layering your hydration, and absolutely never skipping sunscreen, you are setting the foundation for your best skin ever.
Remember the golden rule of this guide: 70% hydration, 30% treatment. Don’t be discouraged if you don’t wake up with porcelain skin tomorrow. Stick to the routine, listen to your skin (scaling back if you feel irritation), and let the science of proper skincare do its work. Your glass skin journey starts tonight at the sink—happy glowing!